A Simple Text Reflection
This tutorial is a simple tutorial that explains how to get a realistic looking reflection when using text or images, simple to follow and easy to understand
Step 1: Open up Photoshop and create a new document with the sizes set to around 500 x 500 and the background should be set to black
Step 2: Choose the text tool and write out whatever the text you want to reflect is, here I have chosen the word “Photoshop” as it is relevant to what I am doing.
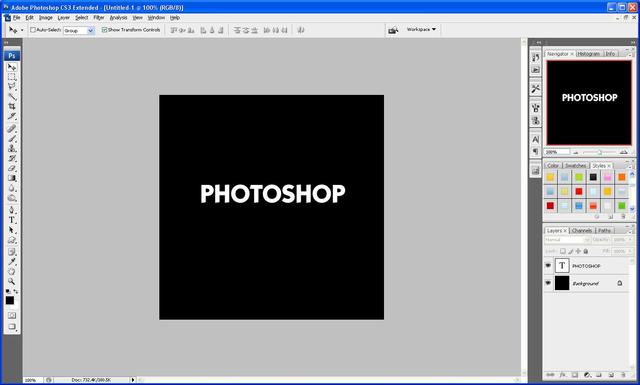
Step 3: Now press the tick on the top toolbar when you have finished typing and then press CTRL+J this then duplicates the text layer so that there are now two
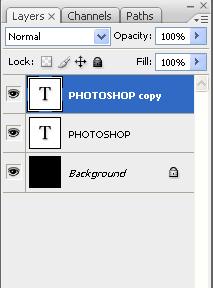
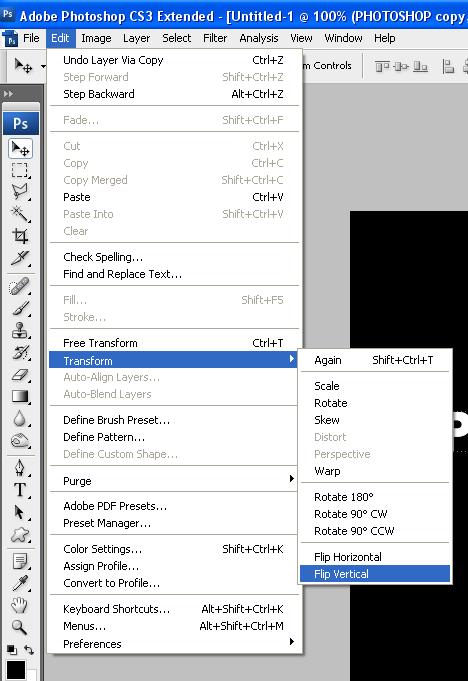
Step 4: With the duplicated layer selected go to Edit > Transform > Flip Vertical this will make the text upside down, now drag it below the original text so all the letters line up, and the press the “Add New Layer Mask” button under the layers palette as shown below:
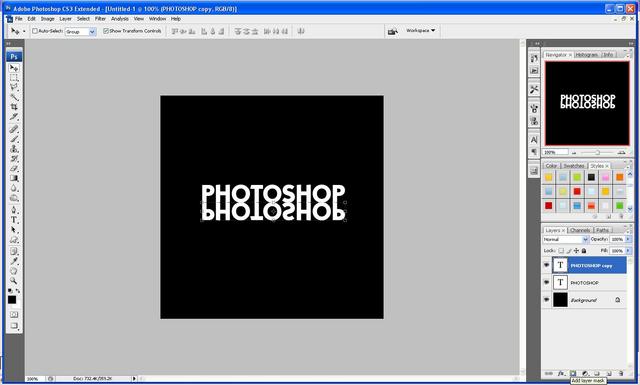
Step 5: With the layer mask selected choose the gradient tool and then click above the “O” and hold Shift and drag downwards to a desired position (the more you drag the weaker the reflection, so it is better if you don’t drag a long way down this allows you to get a more realistic looking reflection)
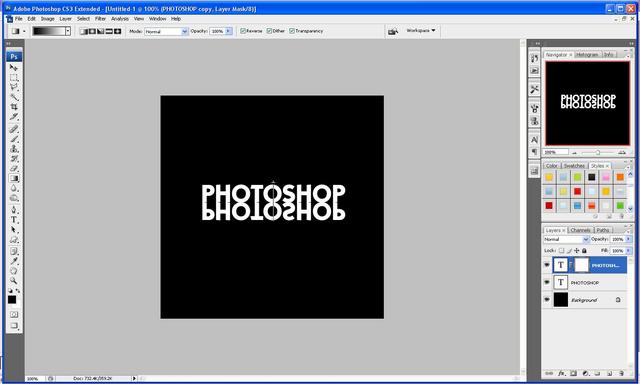
Step 6: After you have found the gradient that you like best you are done and should end up with something like this image below:
If you have had any problems with this tutorial and would like some help then don’t hesitate to contact me either by leaving a comment below or e-mailing me at: stevie489@googlemail.com




realllllllly kool
Hello webmaster
I would like to share with you a link to your site
write me here preonrelt@mail.ru
Hi,
i am having Problem with the mask. I saw in other foruns that i need to select an area befor i use the mask. i tried without any selection and i dont see the mask at all. could you help me
Hi, your last img is broken on the site.
Thanks for pointing that out, I will get it sorted as soon as I can
Great tut, If you want to make more than one button, how can you save the final gradient so that the reflection remains consistent?
Nice tutorial i will bookmark your site thanks…