Text Masking An Image
This tutorial shows you how to use the “Horizontal Type Mask Tool” to cut the text out of an image so that you are left with very unique text, this tutorial can be applied to any image to get a really nice effect.
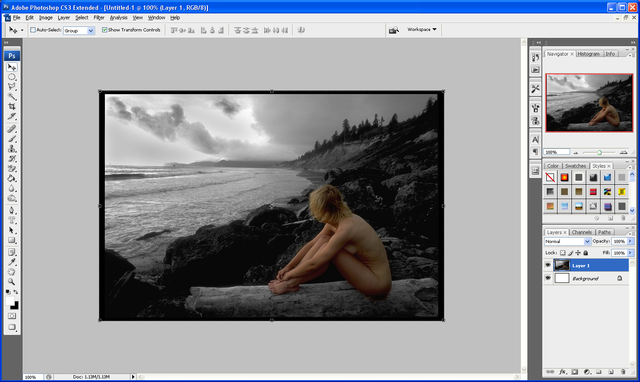
Step 1: First of all you need to get any image that you want and open it up in Photoshop (I used this image for this tutorial)
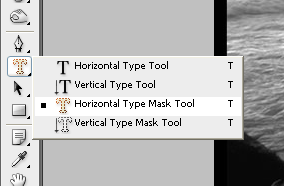
Step 2: Now click and hold on the text tool until the options appear below, and choose “Horizontal Type Mask Tool”
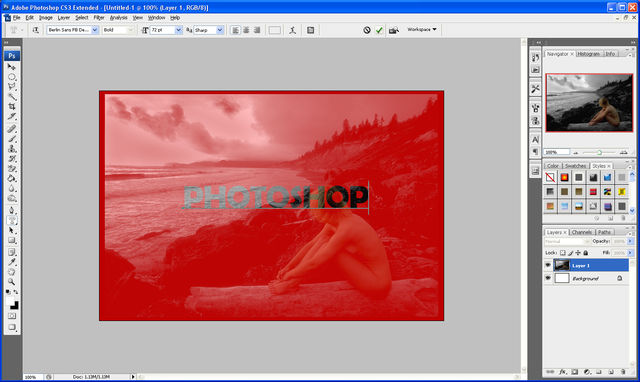
Step 3: Now just write the text you want as you normally would so it looks like below, when done press the tick button on the top toolbar and you will get a text outline selection:
Step 4: Now simply press CTRL + Shift + I and press delete this will delete everything outside of the written Type mask and just leave you with the finished result as shown below:

This can be used on any image and the result can be implemented into any future designs or projects,
If you have had any problems with this tutorial and would like some help then don’t hesitate to contact me either by leaving a comment below or e-mailing me at: stevie489@googlemail.com




Nice, thanks!
why go to all that trouble when you can just type your word and option click between the two layers to create a clipping mask which is actually better for printing? crisp outside edges: type is vector not pixeled from the mask?
well, there are a couple of techniques to get the same effect I only outlined one of them which I thought was most effective and both methods give a nice finish it depends which method you can/know how to use…
Your tutorials are great! I’ve already tried a few of them, but have problems finding a font that works well for this one. They all seem too thin. Which one are you using here? Thanks!
Great, Thanks!
Great! Thanks a lot for the post!
WOW…
i learned something new from this post.
I easily follow the instruction and i made it…
tnx for the useful and easy to follow tutorials…
keep on posting!
Thanks man you’re awesome!
CTRL+Shift+ I
That keystroke doesn’t work! I’m using a mac. What is the equivalent?