Making A Social Bookmark Background

by Steve Tolley

This tutorial will show you how to make the cool image you often see behind the social bookmark links at the bottom of posts on most websites, some are more elaborate than others which helps to make your social bookmarks stand out more, I will show you how to make the background image and what techniques i used in order to get the effect I have ended up with, they are basic steps but ones that can be applied to other situations,

Images You Will Need:

As this is a social bookmarking background we need some images that represent the best social bookmark sites, e.g. Digg, Reddit and Stumbleupon, these can be changed to what bookmarks you prefer or use the most you just need to find your own images, all the images I used are shown below (they all should have Transparent backgrounds so you won’t need to cut them out):

1. Digg

2. StumbleUpon

3. Del.icio.us

4. Reddit

5. RSS Icon

6. Folder Icon

Step 1 - New Document

As always we will start with a new document, for this tutorial I have picked the size of 650 x 200, this is because it best matches my website and it’s sizes so match the sizes you pick to your website (if you are just here for the techniques then use the sizes that I am using)

Step 2 - Draw A Rectangle

For this use the Rounded Rectangle tool (shown below) and draw a rectangle that fits most of your canvas as shown below:

Drawn Rectangle:

Step 3 - Add Blending Options

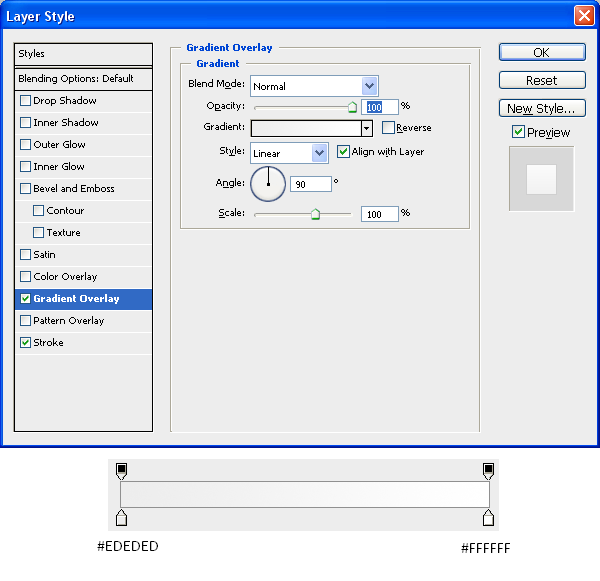
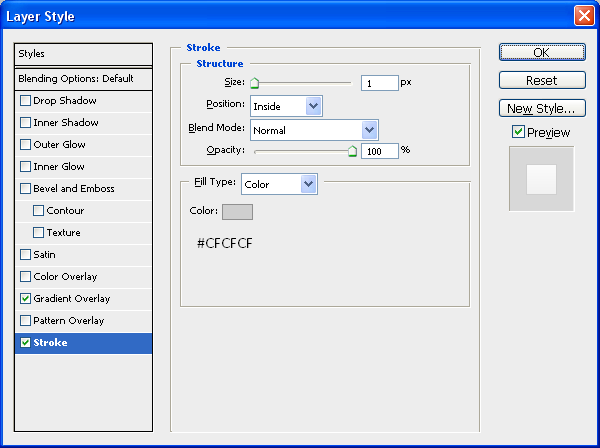
Next we need to add some blending options to the rectangle to make it stand out from the background and look better, I used the settings below, but again this was to match my website so if your website is a different colour or you just want to use a different colour then by all means use what colour you want:

Gradient Settings:

Stroke Settings:

Now you should be left with something like the image below:

Now that we have are main background you can add a shadow underneath it to make it look like a physical presence rather than a flat image by using THIS tutorial which shows you how to add different realistic shadows.

Step 4 - Adding The Icons

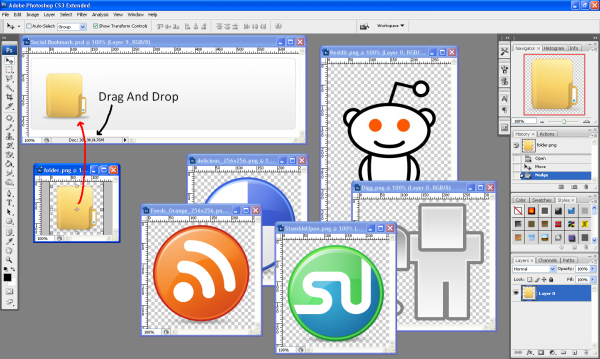
The next step is to add all of the icons to the image making sure that they are in the right positions and at the right size (personal preference) so first make sure you have downloaded all of the icons you need and then make sure they are opened up in Photoshop along with your backround image, to get an image on to your background make sure the Move Tool is selected and simply drag and drop the image onto your image like shown below:

(Note: Once you have placed the image onto the document you can close the original image as you won’t need it anymore and it will create more work room)

Once all images are positioned correctly then you should have something that looks like the below image, if you are following this tutorial to receive the same outcome then use the image below as a guide on where to place the images and what sort of sizes to put them at:

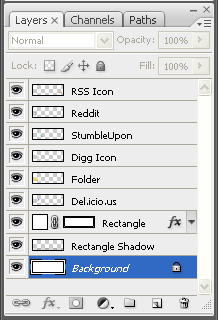
The image below shows the order of the layers which is important to show things appearing in front and behind the folder and rectangle:

Step 5 - Editing The Icons

Next we need to edit a couple of the icons to get the right effect and bring a bit of life into the image,

The Digg Icon

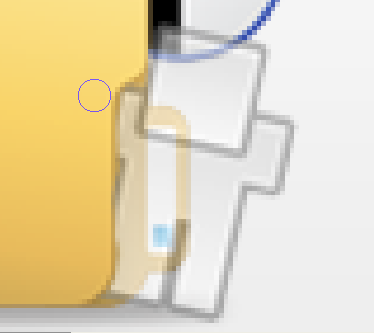
With the Digg icon you can probably see he doesn’t look like he is integrated into the image properly as he is just placed on the top of the folder, to make him look like he is inside the folder looking out we need to rub out a few bits of him

So first make sure that you have the Digg layer selected and then set the opacity of the layer to around 30% this is so that we can see through him and can see the edges of the folder, now we can see this we can pick the eraser tool and rub away the bits that look as though they are infront of the folder the outcome is shown below for reference:

When you have achieved something similar to the above image set the opacity of the layer back to 100% and then you will notice that he looks as though he is part of the image and is looking out of the folder saying “Hello”

The StumbleUpon Icon

Now we need to change the StumbleUpon icon a little bit in order to make it look like it has fallen out of the folder and is heading towards the floor to do this zoom into the image and make sure that the StumbleUpon layer is selected and then pick the Smudge Tool (Shown Below) and just simply click on the outer edge and drag away as shown below:

This will give the illusion of the Icon falling from the folder, repeat this 3 - 4 times across the shape until you have an image that resembles the outcome below:

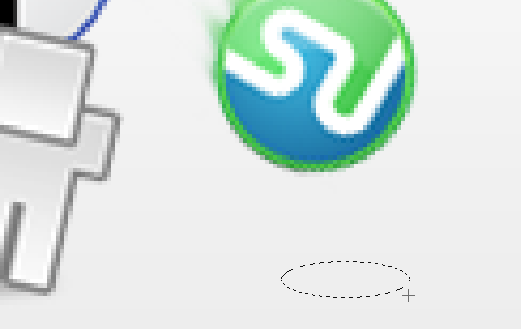
To make the icon look as if it is falling towards the ground we are going to add a shadow on the floor, to do this choose the Eliptical Marquee Tool and draw a oval shape like the one shown below:

Next using the same techniques as in my Realistic Shadows tutorial, create a new layer and fill it with black and set the opacity to around 30% and then deselect by pressing CTRL + D, now go to Filters > Blur > Gaussian Blur and set it to around 3 pixels, this will give a good shadow effect and make it look as if the image is falling towards the ground as shown below:

That is pretty much it, you can add a title like I have done so that people know what it is, (e.g. Save/Promote This Post) and that is the image complete, the final outcome is shown below in my actual social bookmark section.

To get a social bookmarking section like mine and in order to use the image you have just made, follow THIS tutorial that I found when making mine which helped me alot (if you are using WordPress of course)

And you can see a working demo of that and the image below (don’t forget to submit this tutorial whilst your admiring it)

As always if you have any problems with this tutorial then don’t hesitate to leave me a comment or email me at: stevie489@googlemail.com and I will help you as much as I can.

Creating Realistic Shadows

by Steve Tolley

This tutorial will show you how to create realistic shadows using simple methods this can be applied to any object that needs a shadow and the same principles apply for each.

Step 1 - New Document

For this tutorial the document size will depend on the object you want to give a shadow to but for the sake of the tutorial I am using 200 x 200 for a small button that I want to give a shadow to.

Step 2 - Drawing The Shape

I am going to draw a rounded rectangle which I will use for the shape of the button the rounded rectangle tool is the one shown below and the how to draw the shape is also shown:

Step 3 - Applying The Blending Options

Next we are going to apply the blending options to the shape this will be so the shape looks like a Mac style button but obviously you can apply whatever gradients etc… that you want to get your desired effect:

Gradient:

Stroke:

When these options have been applied you should have the same image as shown below, as you can see it looks like a button which could be used for a website (e.g. Navigation)

Step 4 - Creating The Shadow

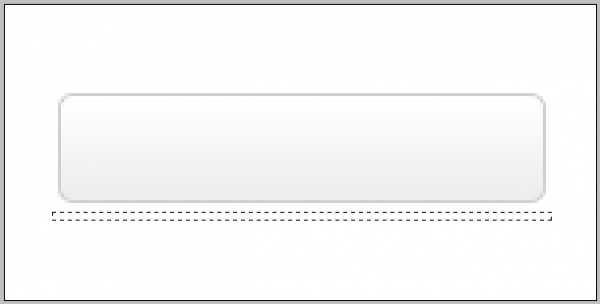
To create the shadow you need to choose the rectangular marquee tool (shown below) and the then draw a thin box across the bottom of the shape, I have zoomed into the image to better show where to draw the box:

Note: Zoom into the canvas to get a better closer view of what you are doing this allows you to be more precise when sizing things up such as the shadow

When this is done create a new layer (CTRL + SHIFT + N) then fill the selected box with black (#000000) and then deselect (CTRL + D)

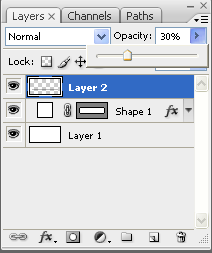
Then next thing to do is set the opacity of the shadow so it is lighter (dependent on how dark you want the shadow to be) so I set the opacity of the layer to 30% as it best suited the situation as shown below:

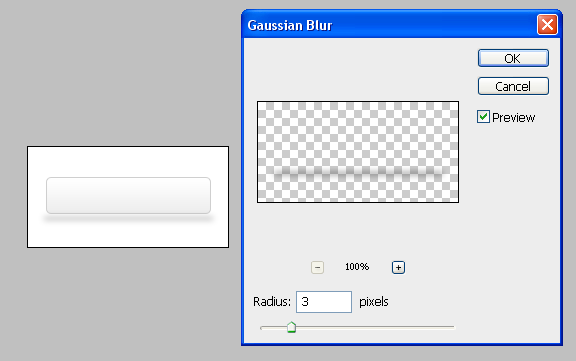
The next and main final step is to blur the shadow so it is not so just a block of colour, to do this go to the top toolbar and go Filter > Blur > Gaussian Blur and then use the settings shown below:

Step 5 - Move The Shadow To Desired Position And Finish

Now that the shadow has been created it can be moved into a desired position there giving the effect of different heights from the surface e.g. as shown below in the 3 examples,

If you have any problems with this tutorial then don’t hesitate to leave me a comment or email me at: stevie489@googlemail.com and I will help you as much as I can.
Folding Corners

by Steve Tolley

This tutorial will show you how to make the folding corners on pages, documents etc…very simple method but gives a great end result, adds a dynamic effect to images and can be used for things such as posters or books etc…

Step 1 - Open New Document

First of all as usual open a new document (or an existing project) any size you want, but for the sake of this tutorial I used 800 x 800,  when this is done fill the background with a desired colour.

Step 2 - Draw The Shape

In this tutorial I want to create the effect of a piece of paper with a folding corner so I pick the rectangle tool and set the foreground colour to white (#FFFFFF) and draw a reasonably sized rectangle in the centre of the document as shown below,

Step 3 - Rasterize Shape

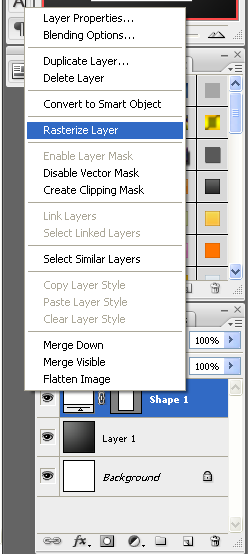
Next you need to rasterize the shape, to do this right click on the layer in the layers tab and choose rasterize layer as shown below:

Step 4 - Polygonal Lasso Tool

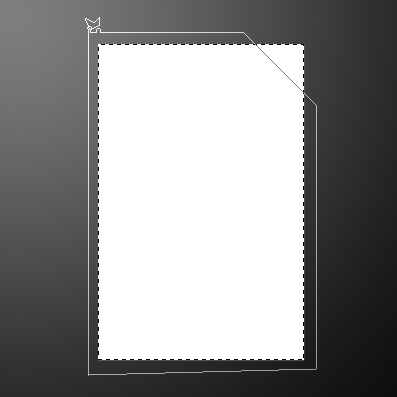
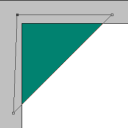
This is the good part, first of all CTRL + Click the box next to the shape layer in the layers tab which shows a preview of the layer, this should bring up the crawling ants around the shape, next choose the polygonal lasso tool, and make sure it is set to subtract from the material, the two icons of which are shown below:

Polygonal Lasso Tool:

Subtract From Selection:

When these two options are selected draw around the shape as shown below (the polygonal lasso tool works in a similar sort of way to the pen tool with the way you draw with it as shown in THIS tutorial)

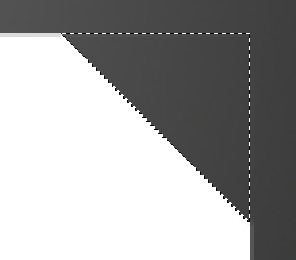
When the two end points are connected together the corner of the page should have the crawling ants around it now simply press delete on the keyboard (make sure the shape layer is selected) and this will delete the corner of the document and will leave you with this result:

Step 5 - Making The Fold

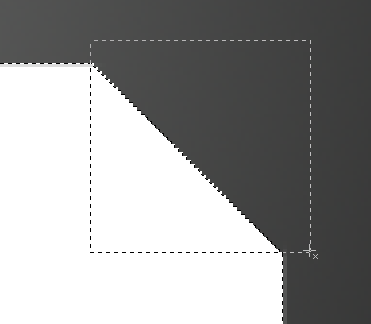
First deselect the corner (CTRL + D) and then CTRL + Click the shape layer again so the crawling ants are around your whole shape again, then choose the Rectangular Marquee Tool and choose intersect with selection which is the option on the right hand side of the subtract from selection, now draw a box as shown below:

And it should create a new corner, at this point press CTRL + SHIFT + N to create a new layer, and the choose the gradient tool and use the colours and positions below:

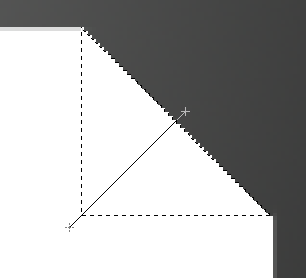
Now press OK and draw the gradient starting from the middle of the corner to the bottom left:

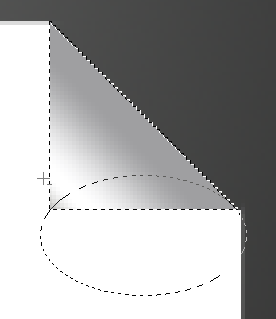
And this should give you a nice shadowy effect dont worry if it’s a bit dark we will sort that out nearer the end, now grab the eliptical marquee tool and make a selection the same as the below image or something similar (Note: make sure it is set to subtract from selection):

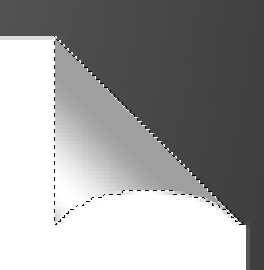
And it will cut out that bit of the corner and make it look curved, now press CTRL + SHIFT + I to inverse the selection and press delete, this will delete the bit of the corner that we don’t want (Note: Remember to press CTRL + SHIFT + I again after to reselect the corner)

And now do the same thing to the left side of the corner but not as big but make it so it shows a slight curve.

Step 6 - Blending Options

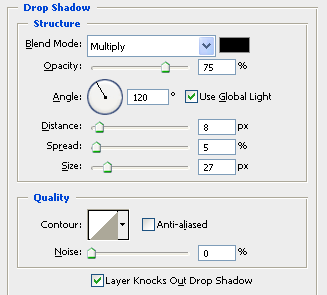
Now to add the Blending Options (Double click the layer in the layer tab) to the folded over corner this is simply just a drop shadow, but use the settings below to get the best effect:

Step 7 - Finishing Touches

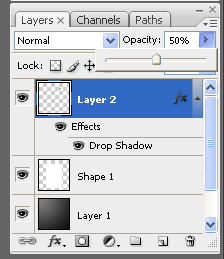
Just a couple of finishing touches to make the page look better, if the corner is a bit dark just set the Opacity to 50% and this will lighted it up as I have done on mine, also you could add a drop shadow to the main page aswell to make it look like it is coming off the background:

Change Opacity:

And then this will give you the final image as shown below:

Finished

If you have any problems with this tutorial then don’t hesitate to leave me a comment or email me at: stevie489@googlemail.com and I will help you as much as I can.
The New Website

by Steve Tolley

WordPress…

As you can probably see the website has changed, as I was promising for quite a while on the old website I was working on a new design, and this is the outcome, so far I havent finished absolutely everything yet as there is still some pages and posts that need to be arranged and added, but I thought I would get most of it uploaded and then finish it from there.
I hope you all like it and any feedback/criticism would be much appreciated, as I need to know of any errors or invalid links/images so if you find any either contact me via the contact form or leave me a comment on this post and I will do my best to fix it.

Also now this is up it means I can start doing some more posts again and upload some more of my tutorials,

There is also a new page on the website called “Your Tutorials” this section is for you to request a tutorial or upload one of your own using the included form (which needs tweaking still) as I am always happy to be helped when writing them as it is difficult to keep on top of this and my studies aswell so any help would be appreciated,

Thanks and happy Photoshopping,
Steve

Bringing Backgrounds To Life Part 1

by Steve Tolley

OK my first tutorial for quite a while now, after successfully securing a place in university I am ready to start posting again whilst looking for a decent host for my new website design (any help appreciated) to get me back into the swing of things I am going to do a relatively easy tutorial to start with, but one I think is very useful when making any type of image that looks a bit plain and boring, the best way to make these sorts of images look better is to simply apply a texture over the top of your background or specific part of the document (e.g. Text) and it is much easier than you may think

Applying a Texture to a Background.

Step 1 - Make a Gradient

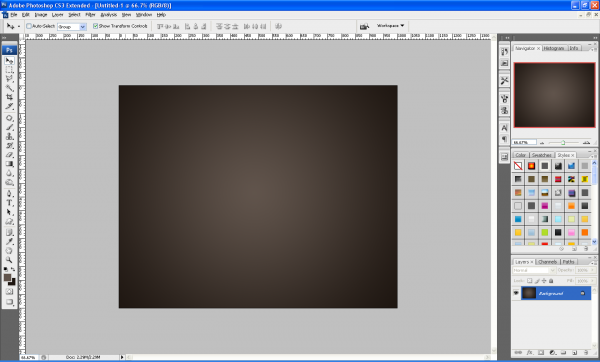
First of all below we have the plain and boring background which I made with neutral colours and a simple lighting effect (Filter > Render > Lighting Effects) in the middle of the canvas.

Step 2 - Drag And Drop Texture Onto Background

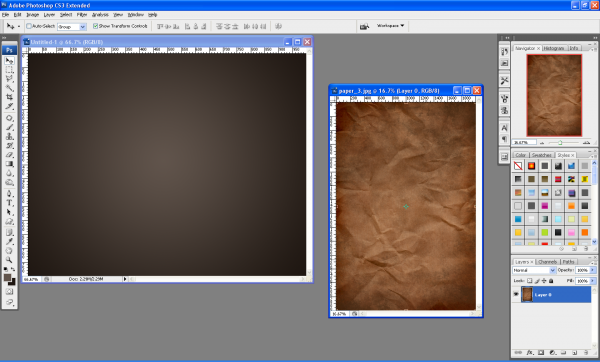
Next we simply open up the texture we want to use and drag and drop it on the background we are using (make sure the texture layer shows “Layer 0” or something similar and not “Background” if this is the case double click the layer and then click OK)

Step 3 - Desaturate The Texture

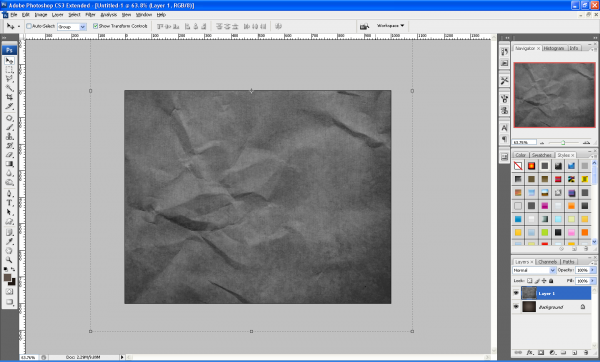
Next position the texture on the canvas so you get the desired effect and then press CTRL + SHIFT + U this combination will desaturate the selected layer / texture

Step 4 - Set Layer Style To Overlay

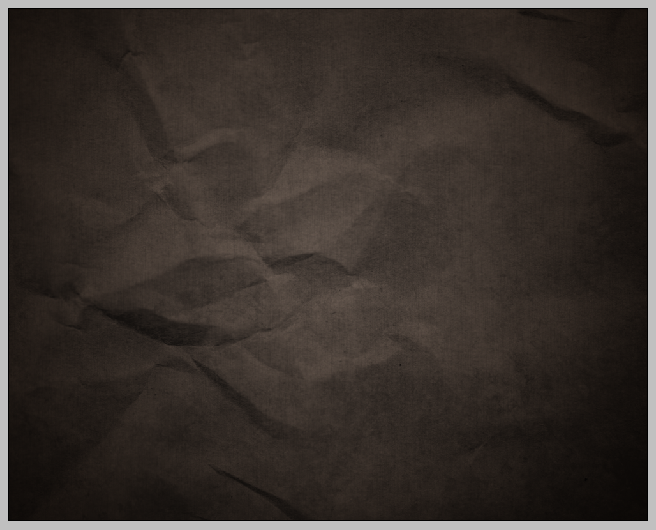
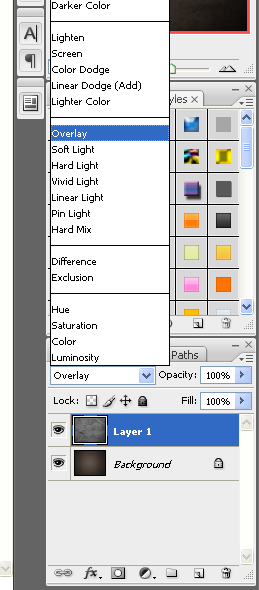
Now set the layer style to “Overlay” as shown below and adjust the opacity accordingly to get the effect (depth of detail) that you want.

Step 5 - Finished

And now the plain and boring background is brought to life by simply adding a texture which adds depth to the image.

This tutorial is the first part of a series that will explain how else you can bring your images/backgrounds to life, sign up to the RSS feed to receive updates when these tutorials are released,

The texture used in this tutorial is available HERE along with 3 other paper style textures,

If you have had any problems with this tutorial and would like some help then don’t hesitate to contact me either by leaving a comment below, or e-mailing me at: stevie489@googlemail.com