Text Quickie - WireFrame 3D Text

by Steve Tolley

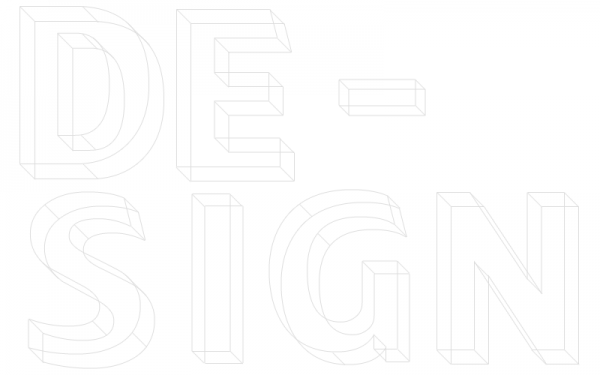
This is a quick text effect tutorial on how to make a 3D wireframe effect, I will show you the basic principle of how to get the effect and will then leave you to experiment with the other letters,

What We Are Going To Achieve

Step 1 - New Document

As always create a new document any size thats suitable for you, and fill with a colour that you want (White works better for this effect)

Step 2 - Writing The Letter

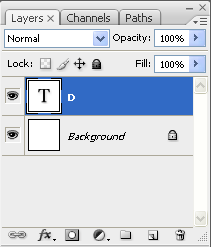
First of all pick the text tool and make sure that your foreground/text colour is the same as your background so it is basically invisible, so dont worry that you dont see the letter but make sure that is in the layers tab,

Step 3 - Adding The Stroke (Blending Options)

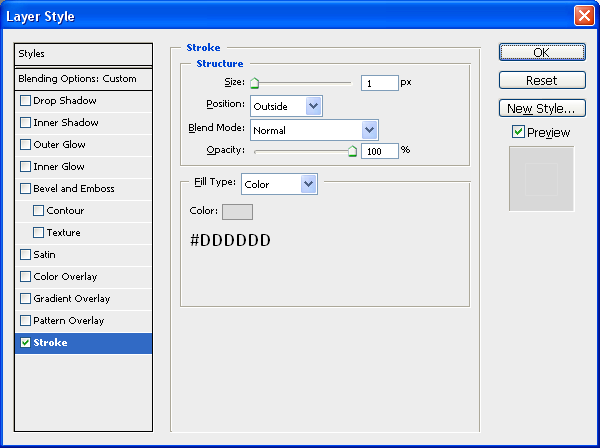
We need to add a stroke to the letter so there is an outline to the letter, so we need to open up the blending options menu (double click the layer in the layers tab) and add the following stroke option:

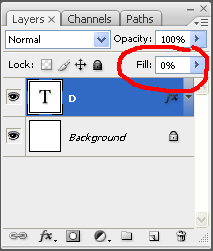
Now you need to make the letter invisible but keep the outline so in the layers tab set the fill to 0% this means that the inner part of the letter is made invisible but the stroke it kept as it is:

When these 2 settings have been applied then you will have an outcome like below:

Step 4 - Create the 3D Effect

Now to make the 3D effect you need to make sure that you have the text layer selected and then press CTRL + J to duplicate the layer with the duplicated layer selected then press the down arrow and the right arrow a few times (down, right, down, right etc…) until you have something similar to below:

Now that we have this done we need to move onto the final step of the first letter:

Step 5 - Connecting The Two Layers

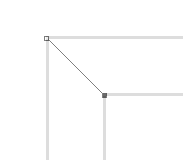
In order to make the text look 3D we need to connect all of the corners together, to do this we use the pen tool and make sure the top toolbar looks like this:

And also make sure that you foreground colour is the same as the stroke colour (#DDDDDD) and then create a new layer (CTRL + SHIFT + N) and then draw a line like below:

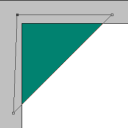
Top Left:

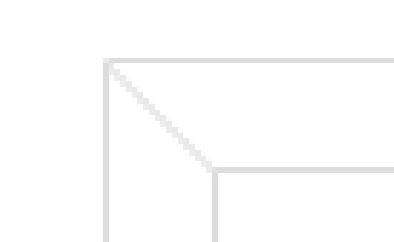
And then right click and choose “Stroke Path” this will make the path into a straight line:

Press CTRL + SHIFT + H to hide the path so that you have the same as above, now do the same on all of the other corners, you can do it all on one layer all you can make a seperate layer for each new path line so that they can be moved easier after, when you are done connecting all of the lines then you will have something similar to below:

So using these basic principles you can apply them to other letters and create cool words and a abit of difference to your text, using these steps I made the below:

It would be cool to see what you come up with so feel free to upload them to the Photoshop Tutorials Flickr Group and leave me a comment to say when you have uploaded one so people can comment on them,

And as always if you have any problems with this tutorial then don’t hesitate to leave me a comment or email me at: stevie489@googlemail.com and I will help you as much as I can…

Best of The Week - 15th To 21st September

by Steve Tolley

As of this week every sunday I am going to produce a ‘Best of The Week’ Selection where I will look through the weeks top Tutorials, Articles and Resources and produce a list of the best ones found, This being my first some feedback in the comments would be appreciated to say whether or not you like the idea,

Tutorials

Awesome Billiard Balls

Unique 3D Text - Xara 3D + Photoshop

Banging Woofer Embedded In Wood

Pencil It In

Make an Inspiring Artistic Poster

Articles

Your Rights As A Photographer

40+ Creative, Courageous and Campy Buttons

18 Truly Awesome Cool Custom Designer T-Shirts

Resources

Hand Drawn Fonts Collection

10 Beautiful Icon Sets For Web Developers and Designers

35 Tutorials For Mastering Photoshop Brushes

I hope that you have enjoyed this collection from this week and that it helps you along the way, if you want to see a ‘Best of’ every Sunday then leave a comment below saying how much you have enjoyed this one and I will keep on doing them.

The ‘Creativity’ Wallpaper

by Steve Tolley

This tutorial is possibly one of my favourites as I love the outcome, we are going to create a desktop wallpaper with a bit of a difference, we will use a range of techniques and most importantly we are going to use our imagination and creativity skills,

What We Are Going To Achieve

Step 1 - New Document

Create a new document that corresponds to the size of your desktop, mine being 1440 x 900, you can check yours by right clicking on your desktop and choosing Properties from the pop up list.

Step 2 - Radial Gradient Background

To start we are going to add a radial background to the canvas, to do this pick the gradient tool and make sure it is set to radial gradient (Top toolbar option) and then set your colours to the below:

With the gradient colours set then drag the cursor from the middle of the document to one of the outer corners in order to get a evenly distributed gradient like below:

Step 3 - Write The Text

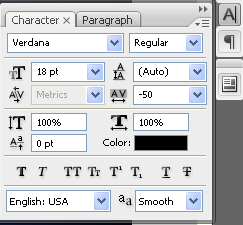
To get the effect so that the “Y” has fallen over you need to write the text seperate, so first of all write the word “Creativit” I have used the font MUSEO which can be found with a quick search in Google and then set the font spacing to “-50″ the font menu can be opened by going to Window > Character on the top toolbar then you can use the settings below:

When you have applied these settings then your text will look like that shown below:

When you have this, then you can write in the Y in a seperate layer, then simply choose the move tool and rotate the Y so that it looks similar to below:

Now that you have the basic layout, you can add some very simple blending options, to do this simply double click the desired text layer and make sure that the drop shadow is ticked and press OK, now do the same for the letter Y and you will have an outcome similar to below:

To add to the effect you can add a simple shadow as shown in the Realistic Shadows tutorial which makes it look as if it is sitting on a floor.

Step 4 - Adding The Spill

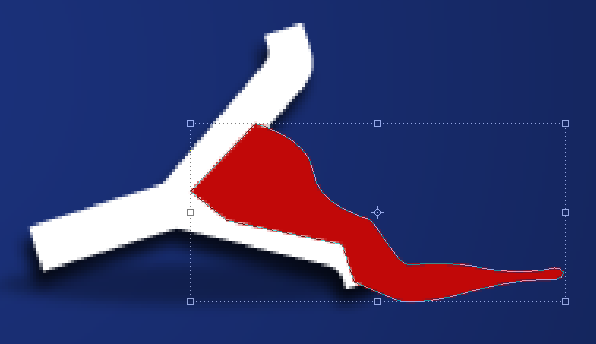
To add the spill make sure your foreground colour is set to a bright colour (I chose RED as that is the colour I wanted the final spill but you can use any colour) and then with the PEN tool selected draw a shape the same as below:

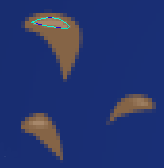
Now move this layer below the letter Y layer in the Layers tab so that it looks as if it is actually spilling out of the letter itself, now we can add the seperate splatters which are simply little shapes drawn with the pen tool, any shape can be drawn and any amount can be drawn it is up to you, also you can use the below image as a reference:

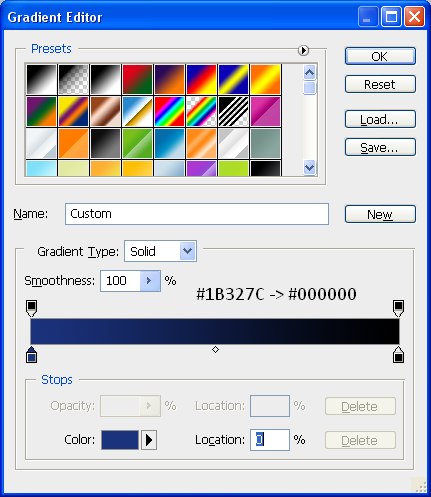
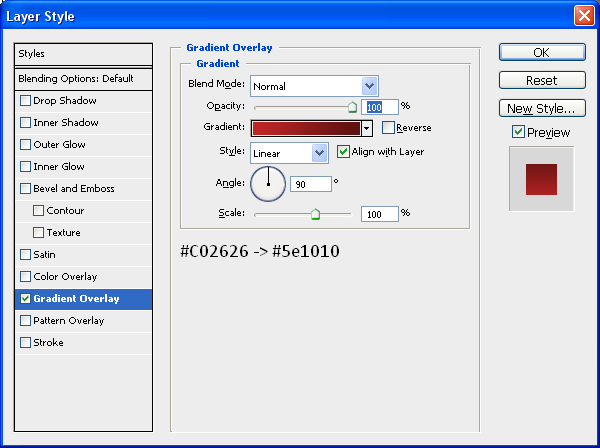
You can also add a gradient to the main spill and the little splatters to get a better effect and add more depth so you can add the Gradient below through the blending options menu:

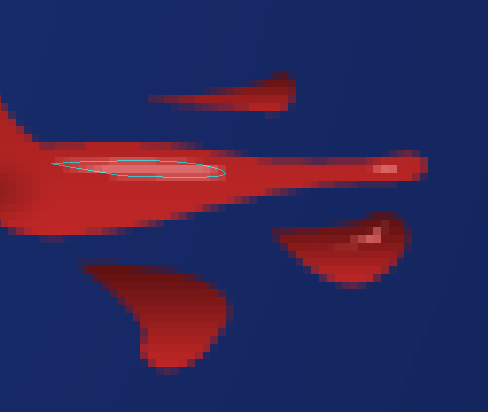
To finish off the spill you can some highlights as shown below, these are made with the pen tool when the foreground colour is set to a lighter version of the original colour used:

When you have applied these highlights then you will have the finished spill like below:

Step 5 - Adding Broken Cables

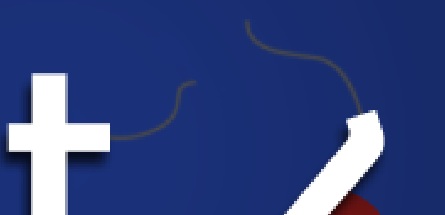
There must be a reason why the letter “Y” has fallen over and spilt the liquid inside…? Well there is the cables that hold it up have snapped, so in this step we are going to make those cables, first of all grab the pen tool and draw a simple path on the end of the horizontal bar on the letter “T” (shown below) once this has been done create a new layer (CTRL + SHIFT + N) and then right click the path you have just made and choose “Stroke Path” and then press OK this will make the path a line created by your brush, now do the same on the top of the letter “Y” and you will have something similar to below:

Apply a simple Drop Shadow through the Blending Options menu and also make sure the cables are white, so if they are not already white, then add a Colour Overlay also through the Blending Options menu and set the colour to white.

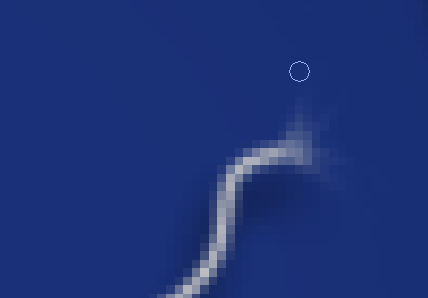
Once the cables are done then we need to make them look as if they are frayed at the ends, so they actually look like they have broken apart, to do this zoom into the end and then choose the Smudge tool from the toolbar (shown below) and simply drag away at the edges so you have something similar to below:

Now do the same to the other part of the cable, once you have done this you will have something similar to below:

Step 6 - Adding The Hat

This step is simple as it is just a case of getting the hat image and inserting it into the document and then positioning it in the right place,

So grab the HAT picture located HERE!

And open it up in Photoshop, when this is done drag it onto your wallpaper document and position on the top left of the letter “C” that is pretty much it as I have already rotated it to the correct angle, but it can be resized/rotated accordingly, when the hat is in place you will have the same as below:

Step 7 - Adding The Liquid In The “V”

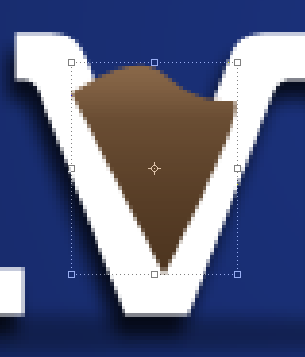
This step is very similar to Step 4 where we adding some liquid/paint to the inside of the letter “V” to do this set your foreground colour to any desired colour that you want and using the Pen Tool again draw a shape like below:

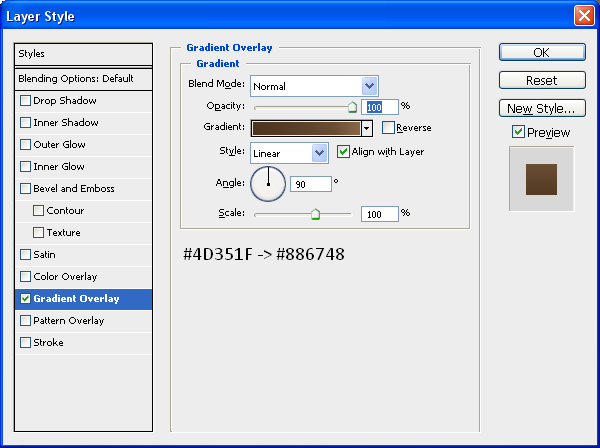
Now drag this layer below your text layer in the layers tab so it looks as though it is inside the letter, and then double click the layer and apply the below gradient (Change the colours if you want to):

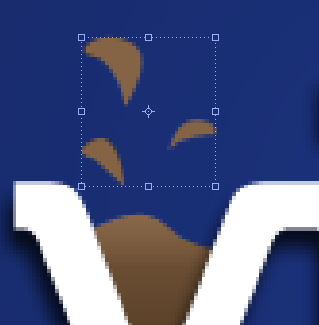
With this gradient applied create some liquid drops so it looks as though something has just fallen in it and splashed it everywhere, use the below image as a reference, once done apply the same gradient to all of these drops:

Now you can add the highlights again using the same methods as in Step 4, grab the pen tool and make a shape but make sure the foreground colour is set to a slightly lighter colour than what is on the drop itself, when this is done you will have something similar to below:

When this is done we will have something similar to below and will be left with one final step:

Step 8 - Adding A Slogan/Motto

To finish we are going to add a simple slogan/motto to the bottom right of the word “Creativity” so make sure your foreground colour is set to white and type the text “It’s Amazing What You Can Do…” or something similar and then open up the blending options menu and add a simple drop shadow you are then left with the below:

With this done we are finished, feel free to add more things to it, and experiment with different shapes and words and see what you come up with, if you create something then why not upload it to the “Photoshop Tutorials Flickr Group” so others can see what you have achieved

So now we are finished you should have something that looks like the below:

And as always if you have any problems with this tutorial then don’t hesitate to leave me a comment or email me at: stevie489@googlemail.com and I will help you as much as I can…

Top Designers and THEIR Inspiration

by Steve Tolley

In the 2nd part of my design inspiration article series I asked 2 TOP Designers/Photoshoppers to let me know what inspires THEM in order to see how they come up with their ideas and what artists, websites, sources etc…they use, here are the answers that I got,

David Leggett - Tutorial 9

Tutorial 9 is a fantastic website offering top quality Photoshop Tutorials and resources, and home to the famous Photoshop School which will teach the beginner how to progress in Photoshop with exams at the end of each grade.

My work is mostly web based, so I do a lot of web design, interface design, etc. My goal as a designer is to balance compelling media with a usable interface. When it comes to inspiring myself, I like to browse through online galleries like http://screenfluent.com/, http://www.designflavr.com/, http://www.behance.net/, and see what friends are doing on Flickr.

Screenfluent

DesignFlavr

Behance

A lot of my inspiration comes from outside the web though. For example, I greatly admire the folks who design magazines like WIRED - who really use unique grids in their work to create page layouts that are really creative and out of the ordinary. Along with magazines, I like collecting album art, cool package/product designs, and flyers/business cards.

I’ve got a bunch of really artistic friends that are fun to watch as well. Whether I’m bouncing ideas off them, or if they ask for my opinion on their work, I find myself being inspired all the same.

Last, but not least, scenery is a great tool for me. Not just nature, but taking in an entire scene of just about anything, and observing how things fit together or stand apart from each other. Skylines, Offices, the Outdoors, anything really.

Adelle Charles - Fuel Your Creativity

Fuel Your Creativity is a website dedicated to design and web resources, offering great links to cool websites, Adelle describes her site as being: “An open forum where everyone is welcome (and encouraged!) to exchange ideas and tips. It’s not just for designers either. Writers, photographers, graffitists…come one, come all.”

PatternTap

This site is such a great resource for all types of design. Everything is broken down into categories or sets to quickly find the type of inspiration you’re looking for. When I’m working on website comps, I usually visit the “articles” & “layout” category and when gathering research for fuelyourcreativity.com posts, I head over to the “typography” section.

WebDesignerWall

Amazing articles on web design to get your creative juices flowing. The site itself is inspiration! Great site to visit daily for design trends, ideas and tuts.

Faveup

Great place to look at Logo designs, Business Card Designs & Flash Websites which are all user submitted. Another great inspirational site made by the folks over at Envato. I primarily use faveup to check out logos & business cards.

BestWebGallery

One of the best showcases around to draw inspiration quickly. They have some of the best looking sites listed and my favorite part about the site (or most useful) is the rollover (very fast) screenshot view. In most cases if I don’t like the quick view - I keep on going.

Typesites

Tasty sites focused on typography. What can I say; sometimes those are the best looking sites! Great inspiration and go to when you’re stuck on layouts.

Twitter

Believe it or not - I gain inspiration from the people I follow on twitter. No it’s not a gallery, but if you utilize twitter in the right way, you can get a lot of opinions on things fast and check out what other people just like you are doing, reading, surfing & talking about. This has been one of the best tools for me & inspiration on blogging or even what to blog about.

Design Inspiration from Other Top Designers

Both of the above have done posts on what inspires them and how to best utilize the web in order to get the most out of the inspiration available to use, so just click on either of the above links to find even more inspiration sources etc…

Useful Designers to Follow on Twitter

Some of the most useful and influential people to follow on twitter are listed below, this is because they offer good feedback on work and generally tweet about interesting articles around the web, which offer more inspiration and some general fun along the way,

And then there is always me, I try my best to help my fellow twitterers, so head over to MY TWITTER PAGE and click the little follow button,

Thats all I have for this article, hope you enjoyed it and that it has helped you find that much needed inspiration, when I was making this article I enjoyed looking at the websites that these designers use and have bookmarked my favourites to help me when I need inspiring.

Creating A Retro Grunge Poster

by Steve Tolley

This tutorial is an add on from the Poster article the other day, we will create a Retro/Grunge style poster using the pen tool some textures and playing with text to make it look more retro,

What We Are Going To Achieve

Step 1 - Create A New Document

First of all as always create a new document using the sizes 750 x 1000, this size is suitable for a poster design.

Step 2 - Grab The Pen Tool

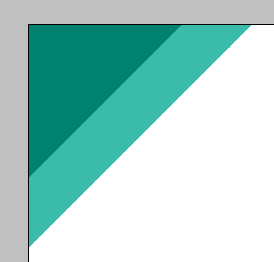
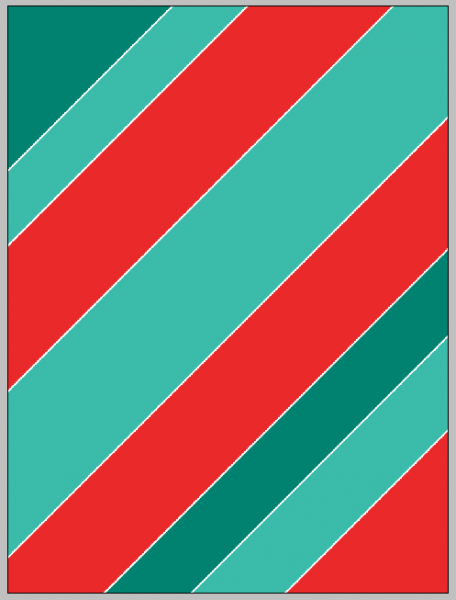
Now you need to grab the pen tool and start drawing some shapes, first set your foreground colour to #018270 and draw a shape the same as below to get perfect 45 degree angles when drawing with the pen tool hold down shift and click at what you think is 45 degrees and it will make it straight:

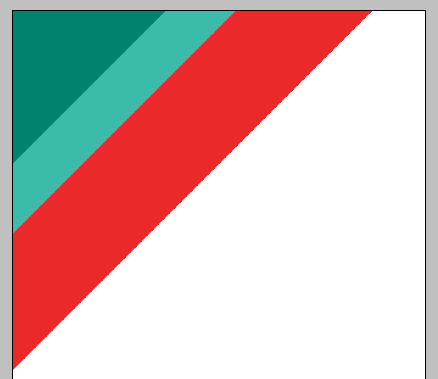
Now continue with this same method, but when drawing the rectangles make sure the shapes differ in size to add some variation within the poster, Use the colours as shown below:

#3bbba9

#ea2a2a

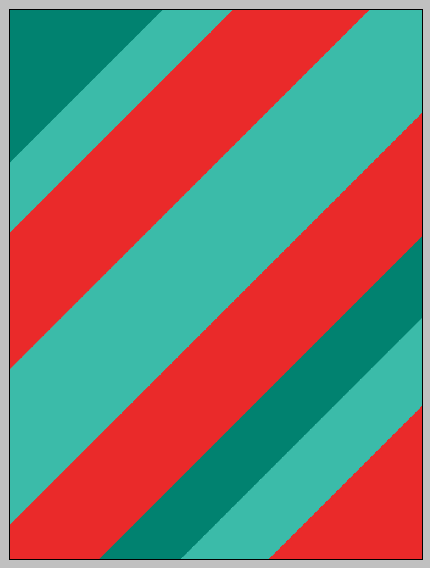
Now continue mixing and matching with these colours until you have something similar to below:

Step 3 - Blending Options

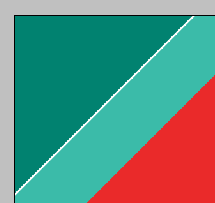
Now we are going to add a simple Stroke to each of these shapes to do this, double click on the first shape to bring up the blending options menu, from here select the stroke at the bottom and make sure the colour is set to white (#FFFFFF) and leave the size at 3px:

Now we need to repeat this throughout all of the shapes to do this right click the first shape in the layers tab and choose the option Copy Layer Style and then right click each of the other shapes and choose Paste Layer style, this will simply copy and paste the stroke to all of the shapes this will leave you with something similar to below:

Step 4 - Adding A Background Texture

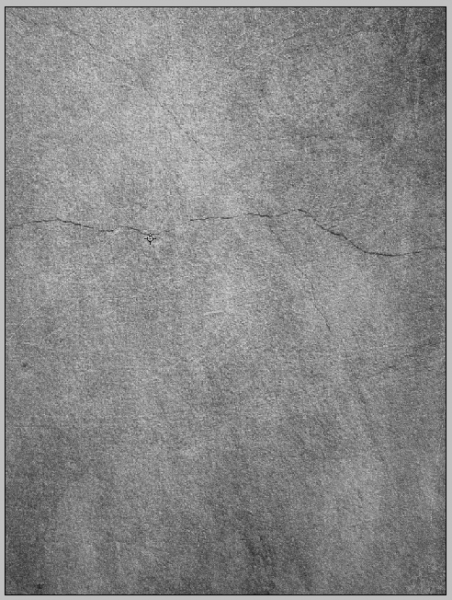
Now we are going to add a background texture to the shapes to do this grab hold of THIS texture and copy and paste it into your current document and resize and position so that you are happy with it, when you are happy press CTRL + SHIFT + U to desaturate the layer, you now should be left with something like below:

When you have the same as above all you need to do then is set the layers style to Multiply:

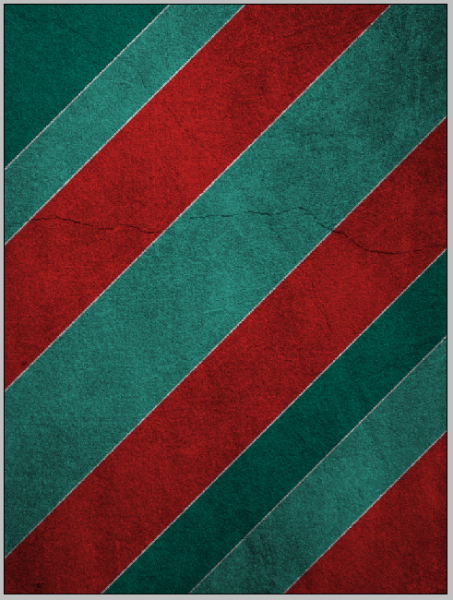
When this is done then the background texture is complete and you should have something that looks the same as below,  notice the grungy sort of look to the background:

Step 5 - Adding The Text

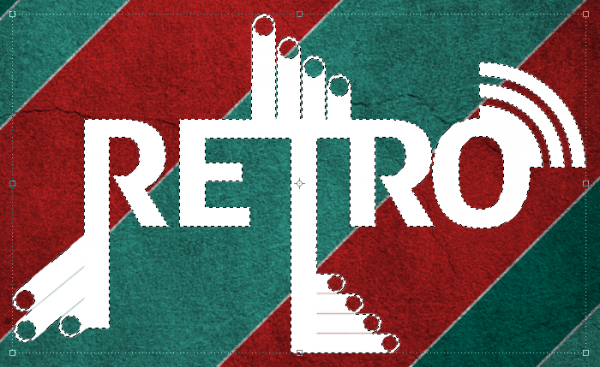
Now we need to add the text to the document, I have added the text “RETRO” all in capital letters this is so that it corresponds with the effect we are going for, the text I have used is called ADFBEasterEgg which can be found HERE when you have the text added to the centre of the document you should have something like this:

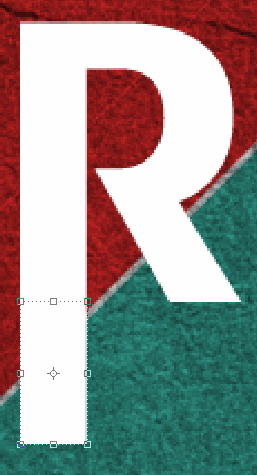
Now we are going to modify the text by making the letter T and the first letter R longer, to do this grab the rectangular marquee tool and make a selection the same as below:

Now make sure that the Text layer is selected in the layers tab and then pick the move tool and press CTRL + C to copy the selection and then create a new layer (CTRL + SHIFT + N) and then simply paste the selection by pressing CTRL + V and position the layer underneath the selection made as shown below:

Now you can resize the selection as you see fit, I have lengthened it to the length shown below, I have also applied the same method to the letter T, when these are done you will have the same as below:

Step 6 - Adding Brushes

This step is simple as all you need to do is to download THESE Retro brushes and also THESE brushes and simply play around with the different options/brushes that are available, for a guide on installing brushes simply go to THIS tutorial on Tutorial9.net once these brushes have been downloaded and installed then play around and use the below image as a reference to what brushes to add where:

Step 7 - Adding A Background To Text

We are going to add a background to the text, to do this we need to group all of the layers that make up the text so select the layers by CTRL + Clicking them individually in the layers tab and the right click and choose Merge Layers (Note: You may need to rasterize the text layer so simply right click and choose rasterize layer this will convert it to pixels)

When you have all of the layers that make up the text into one layer CTRL + Click the box next to the layer in the layers tab which will select all of the outside and you should see the crawling ants like below:

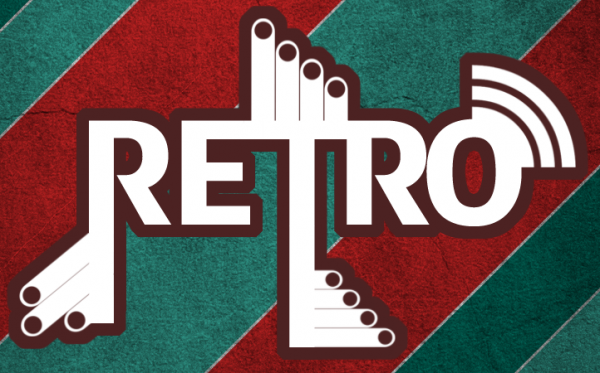
With this selection made go to Select > Modify > Expand and use the settings shown below:

When this expand has been applied you will have a selection as below:

When you have this selection create a new layer (CTRL + SHIFT + N) and then pick the Fill Tool and fill the selection with the colour #4c2222 you will then have the below:

Step 8 - Adding A Texture To The Text Background

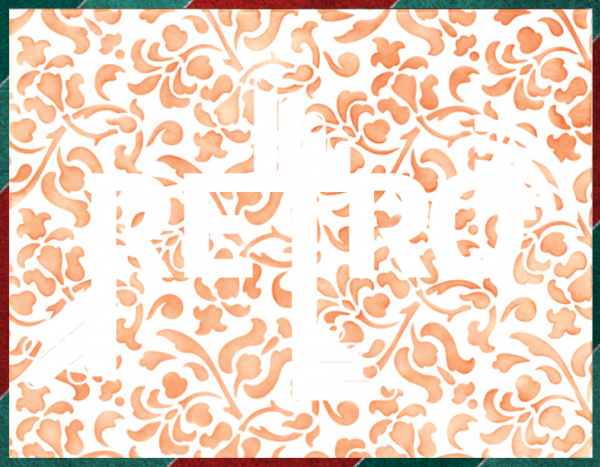
To finish we are going to add a texture/pattern to the background we have just created for the text, to do this grab hold of THIS pattern and copy and paste it into your poster and position it over you background (Note: Place the pattern layer below the text layer BUT above the background text layer so it gets applied to the background only)

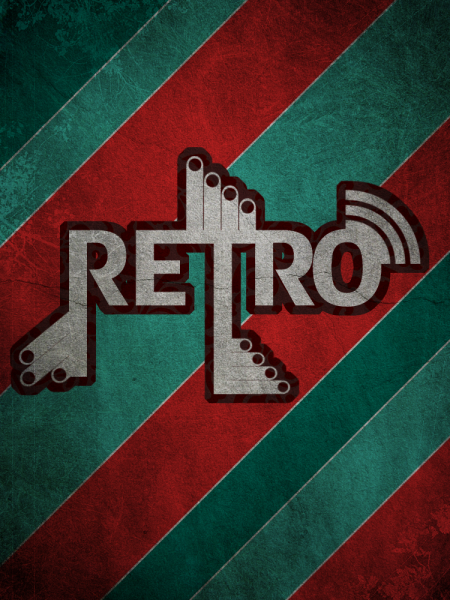
Now right click the pattern layer in the layers tab and choose Create Clipping Mask and then to finish set the layer style to Color Burn this will then get rid of the white from the image and darken the remaining colour, now place the grunge texture above all of your other layers so that it is applied to all the layers this will then leave you with the finished poster:

And as always if you have any problems with this tutorial then don’t hesitate to leave me a comment or email me at: stevie489@googlemail.com and I will help you as much as I can…

If you have taken the time to have a go at this tutorial then upload your finished images to the Photoshop Tutorials Flickr Group so others can see what you have achieved using these methods.

Design Inspiration - Posters

by Steve Tolley

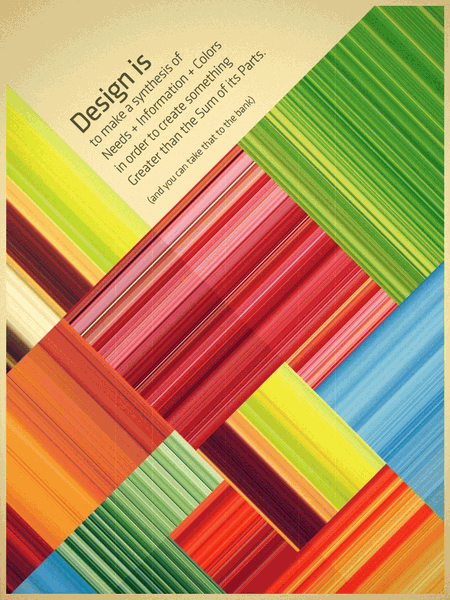
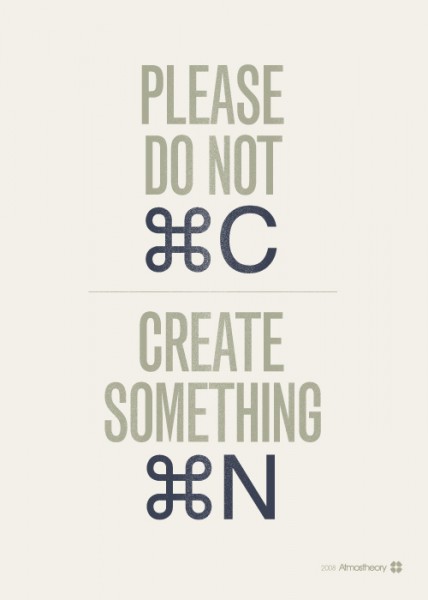
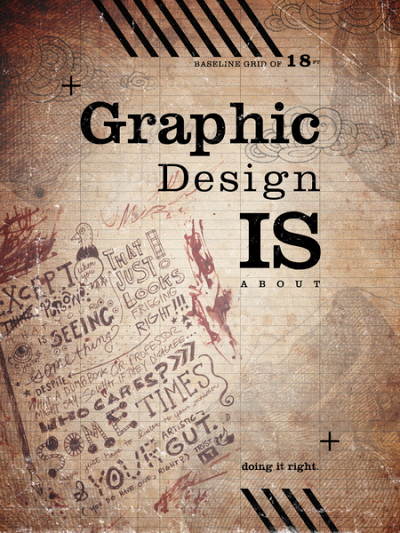
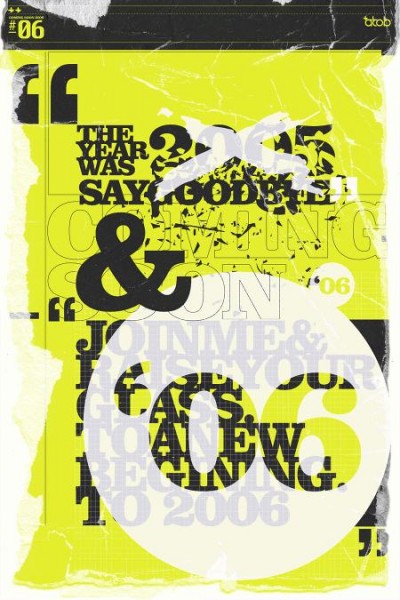
This article will get your desiging juices flowing, Part 1 in a series of design inspiration articles, this one will look at modern and old posters, I have hand picked the ones that I believe are the best at giving you ideas, they have certainly given me some,

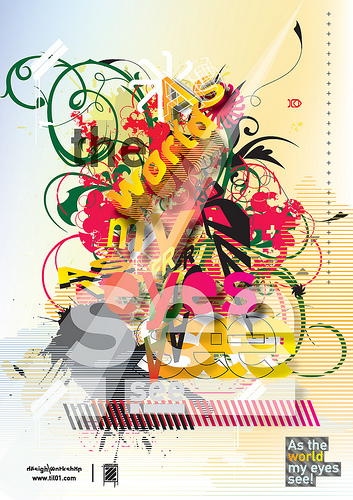
1 - As The World My Eyes See

2 - Design Is…

3 - Do Not Copy, Create Something New

4 - Graphic Design Is About…

5 - Error 404

6 - Coming Soon

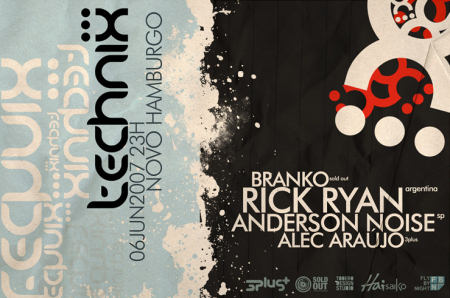
7 - Technix

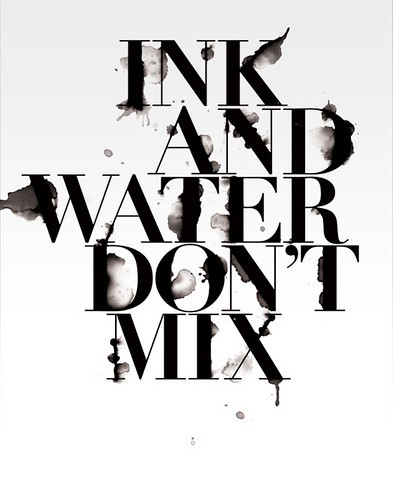
8 - Ink And Water Don’t Mix

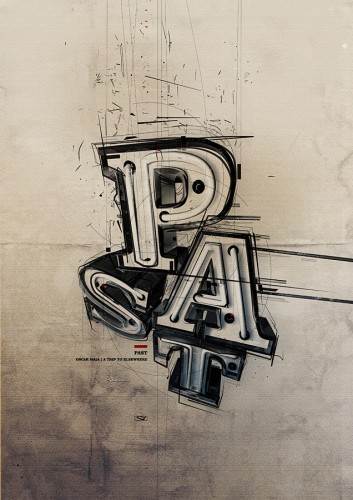
9 - Past

10 - Love…

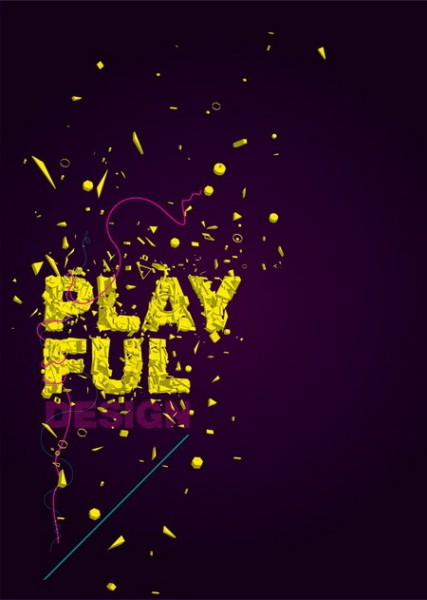
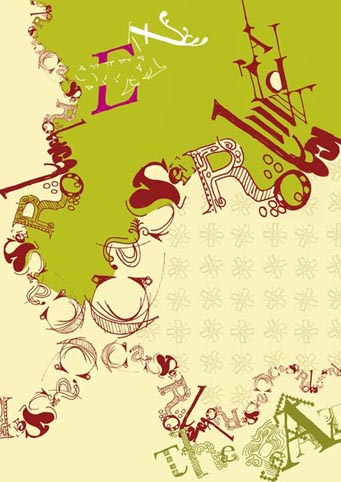
11 - Playful

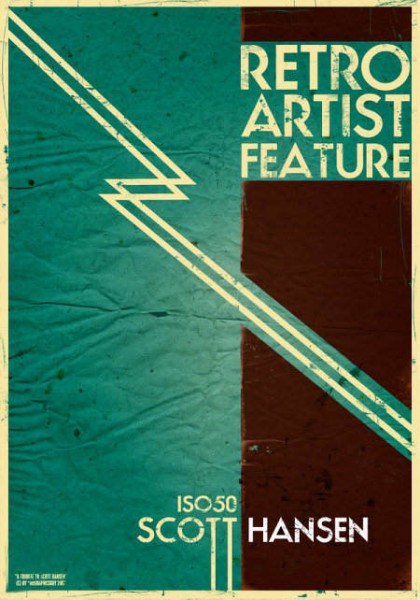
12 - Retro

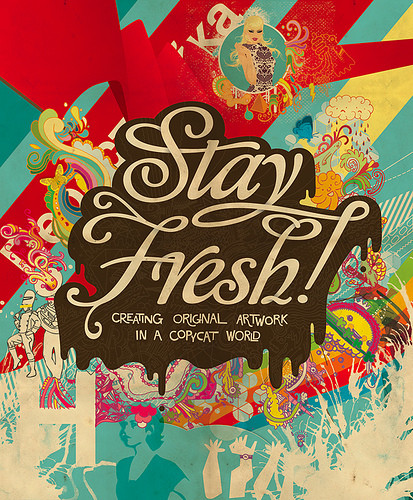
13 - Stay Fresh

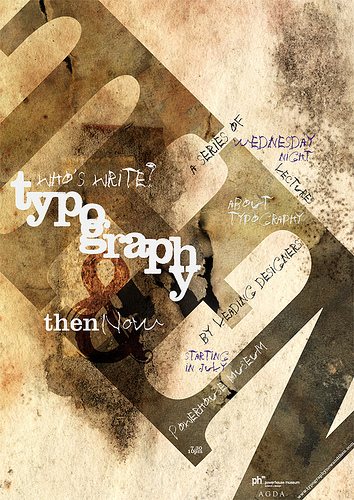
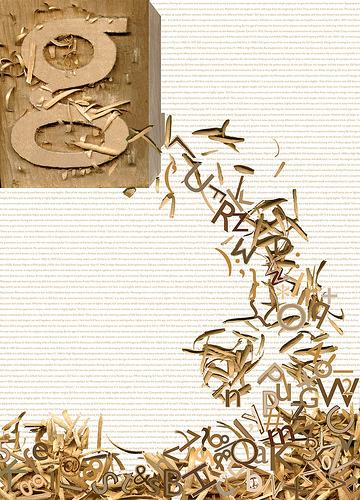
14 - Typography

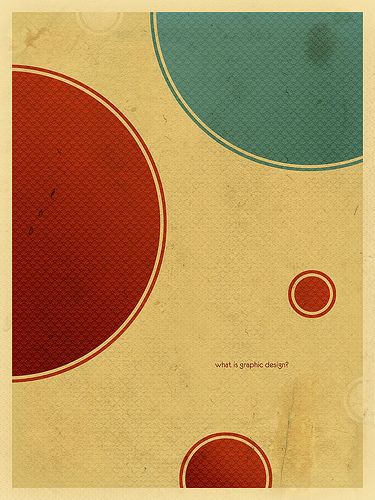
15 - What Is Graphic Design?

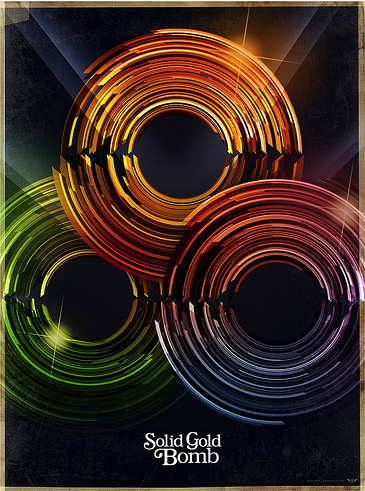
16 - Solid Gold Bomb

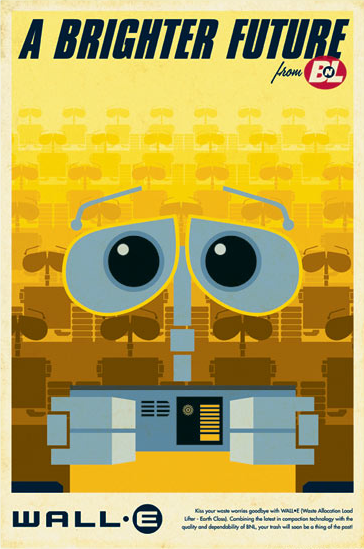
17 - Wall-E

18 - Gill Sans

19 - Formality

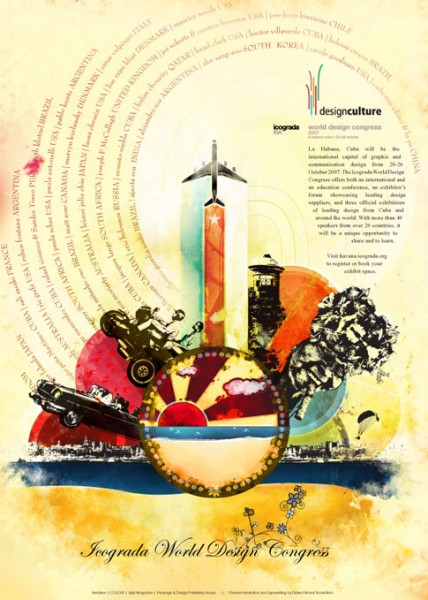
20 - Design Culture

And there you go, I hope you all have enjoyed looking at this collection of posters and that you are now in the mood to go and get some cool designs done, Part 2 will be design inspiring websites, so make sure you sign up to the RSS Feed so that you don’t miss it.

Paint Splodge Text

by Steve Tolley

This is just a quick text effect tutorial, This will show you how to simply create a paint splodge looking text using blending options and the pen tool it will take only around 5 minutes to complete (Depends how much detail you add).

What We Are Going To Achieve

Step 1 - New Document

First of all open up a new document around the size 500 x 500 and fill with a radial gradient from #102f40 to black (#000000) so you are left with something like below:

Step 2 - Add The Text

For this tutorial I am just doing a single letter so I can show you the techniques, but this can be applied to any letter of the alphabet, therefore I am going to use the letter “P” so simply pick the colour that you want the paint to be and write your text in that colour:

Step 3 - Add The Splodge

Now you can draw the paint splodge simply pick up the pen tool and draw what resembles a splodge of paint, not every splodge will look the same so just experiment and play around until you get something you are happy with (make sure it is filled with the same colour as the letter), when done you should have something similar to below (can be used as a reference)

Step 4 - Add Blending Options To Both

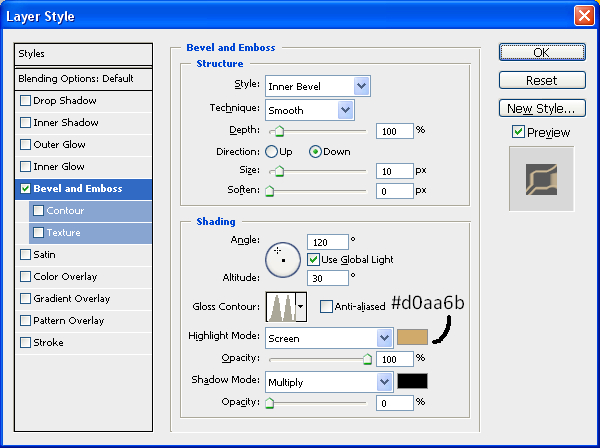
We shall add blending options to the text first so double click the layer in the layers tab which will bring up the blending options menu, when this is open use the settings as shown below:

Bevel And Emboss:

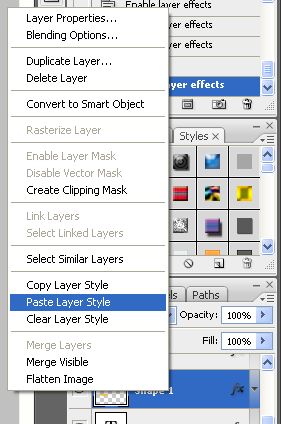
With this applied right click on the Text layer and choose “Copy Layer Style” and then right click on the Splodge layer and choose “Paste Layer Style” as shown below:

This will simply copy and paste the blending options to the splodge shape when this is done you will have some text and a splodge that resembles that shown below:

Step 5 - Positioning And Adding Details

Now you need to position the splodge so that it looks like it is part of the text so just simply play around with moving it around until you get something you are happy with:

With it now in position you are nearly finished all you need to do now is add some detail, like some drips of paint and extra splodges on the floor, this is all simple to do but just play around with the pen tool creating cool shapes and then don’t forget to keep pasting the blending options onto each new splodge you do, and have fun experimenting, when you are done you will have something that resembles my finished product:

And as always if you have any problems with this tutorial then don’t hesitate to leave me a comment or email me at: stevie489@googlemail.com and I will help you as much as I can…

15 Of The All Time Best Text Effects

by Steve Tolley

This article is rammed full of the 15 BEST text effects around at the minute, it has taken me a while to filter out the best text effects from the not so great ones, even though there are alot of fantastic ones out there they can’t quite compete with the quality of these ones, and yes the majority are from sites such as PSDTuts and Tutorial9 as these do produce tutorials of the highest quality so here we go…

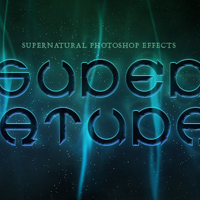
1. Super Natural

A fantastic text effect tutorial to start us off with, this tutorial takes advantage of the Wave Distortion filter in Photoshop to give an eerie supernatural text effect.

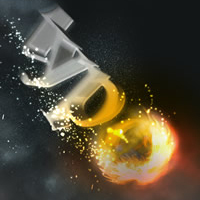
2. Flaming Meteor Effect

This tutorial takes text effects one step further and makes it look as though your text is truly falling from the sky in a ball of flames, this tutorial was written by Fabio who also owns Abduzeedo which I must say is a fantastic website for similar effects.

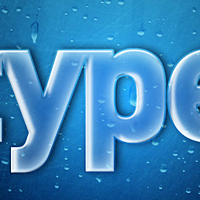
3. Transparent Glass

This tutorial shows us how to simply but effectively create a transparent glass effect for our text which finishes up to be a very realistic outcome, what else do you expect from PSDTuts?

4. Smooth Glass

This tutorial is similar to the previous one in the list but then again the end results are very different, but another great tutorial blending together rather simple techniques to bring such a professional and realistic outcome.

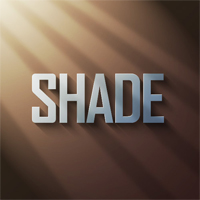
5. Using Light And Shade To Bring Text To Life

This tutorial is not as such a text effect but how to bring your text to life by using light and shade and again the outcome is amazingly realistic.

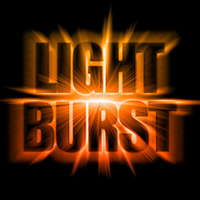
6. Light Burst

This tutorial has been around for quite a while now and has been very popular but is still classed in my eyes as one of the best text effects as the simplicity coupled with the great outcome makes it stand out from the rest.

7. Earth

A fantastic text effect again from PSDTuts this shows us how we can use actual images placed on top of the text to create a fantastic end result, this is also one of my favourite tutorials because of it’s realism.

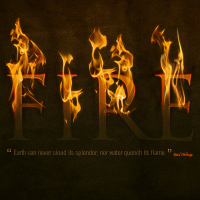
8. Dramatic Fire

This fire effect makes this stand out from the rest simply for the fact of  how well it is implemented into the text and how an image of fire can be used to make a truly realistic outcome compared to computer generated fire.

9. Snow N’ Ice

Another favourite of mine because of the cartoony effect this gives, I can see this being used in a poster for a wintery cartoon/movie for instance Ice Age and a result that can be gained so simply.

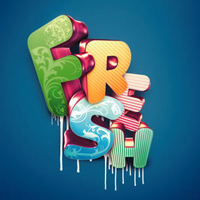
10. 3D Typographic

An effect which has also been around for a while but again still one of the best out there, this combines the use of a 3D program called Xara 3D, this creates letters with realistic lighting and shadow, these letters are  then imported into Photoshop to make them look as good as they do.

11. Ghost

A not so well known tutorial but one that I think results in a fantastically creepy ghost effect which can be implemented into many scary designs/images

12. MoonShine

A relatively new text effect in the tutorial world but one that stands out from the rest simply due to the fact of the professional looking outcome and simple techniques that can be learned from this tutorial.

13. Colourful Glowing Text

Again another new text effect but one that is explained so well, from Tutorial9 which is a fantastic website full of inspiring tutorials and great effects.

14. Grunge

A great effect in this tutorial showing how to create a fantastic grunge style text effect using textures and layer styles from a great website that looks to be going to same way PSDTuts has gone with it’s popularity.

15. Layered Glowing Effect

And to finish another fantastic tutorial from PSDTuts this effect uses multiple layers to create a truly spectacular glowing effect which I can see myself using in future projects.

Summary

To summarise as you can see all of these tutorials are of the highest quality and A LOT can be learned from them which can then be used in your own projects/designs, I would like to say a big thanks to all of those people who have taken their time to create such fantastic inspiring tutorials and hope that my tutorials can one day match the quality and standard of the ones shown in this article.

Creating A Grungy Banner

by Steve Tolley

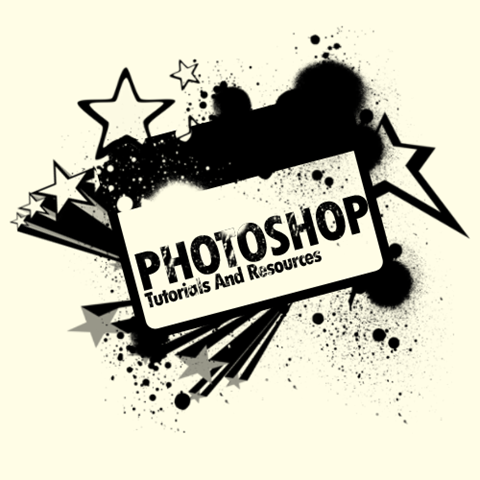
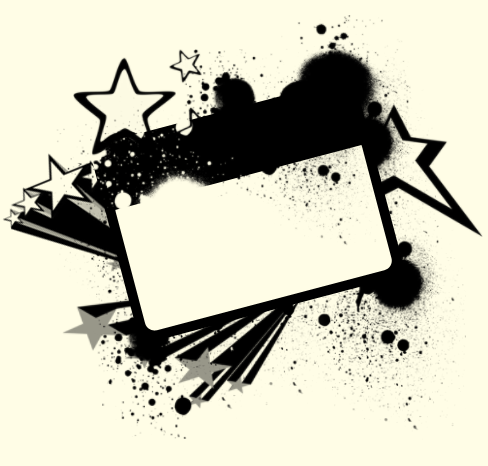
This tutorial will show you how to create a grungy style banner that can be used on posters or on websites, it is a very simple process and therefore quite a short tutorial but offers techniques which can be used on any project,

What We Are Going To Achieve

Grungy Banner Done

Step 1 - Create New Document

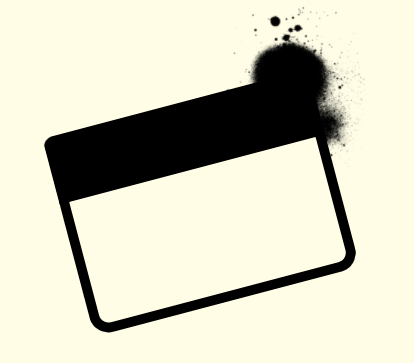
First of all as always you need to create a new document for this tutorial I have used the sizes 500 x 500 but as normal you can use whatever size is suitable for you, once you have this then fill the document with the colour #FFFDE6

Step 2 - Draw Some Rounded Rectangles

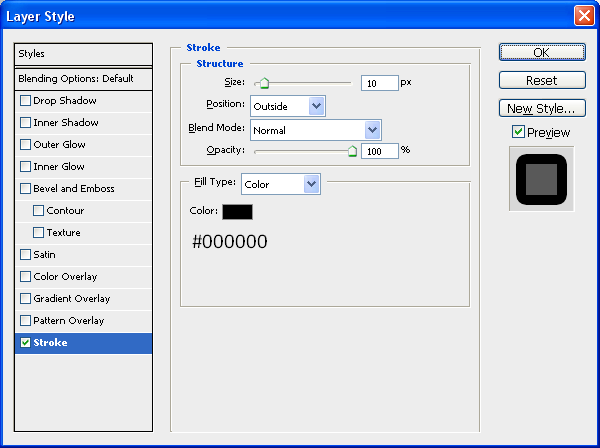
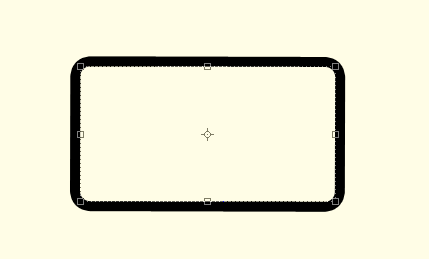
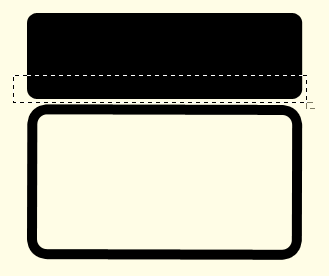
This step is simply to draw 2 rounded rectangles using the rounded rectangle tool (shown below) so make sure that your foreground colour is set to #FFFDE6 and draw a rounded rectangle with a radius of 5px, when this is done double click the new shape in the layers tab which will bring up the blending options menu, with this open use the below settings:

Rectangle Tool

Stroke:

Rectangle Stroke

With these settings applied you should have something similar to below:

First Rectangle Done

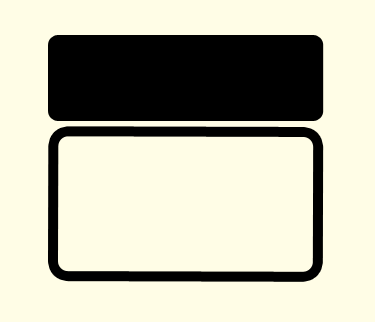
Now we need to draw our second rounded rectangle, this time make sure that the foreground colour is set to black (#000000) and draw a shape the same as below:

Second Rectangle Done

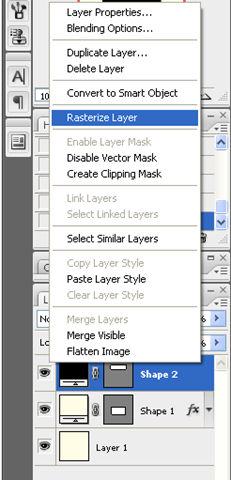
Now right click in the layers panel on the second shape and choose rasterize layer as shown below:

Rasterize Layer

With this done select the Rectangular Marquee Tool (Shown Below) and make a selection the same as what I have done below:

Rectangular Marquee Tool

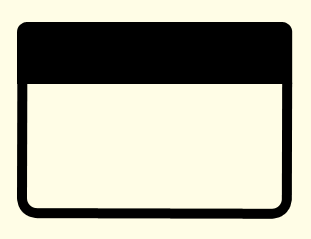
When you have the same selection simply press delete (Note: Make sure that you have the second shape layer selected otherwise it won’t do anything) when this is done you should have a shape with a flat bottom which then needs to be positioned on top of the other shape as shown below:

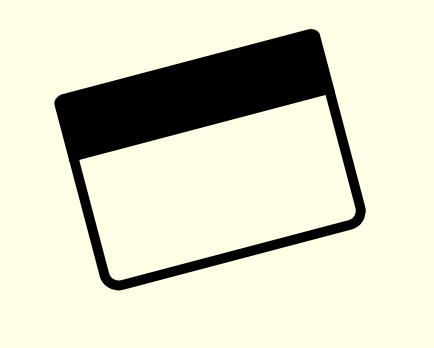
Now to finish off with these two shapes select both of the in the layers tab (CTRL + Click both of the layers) and then choose the Move Tool and rotate the two layers so that you have the outcome below:

Step 3 - Adding The Brushes

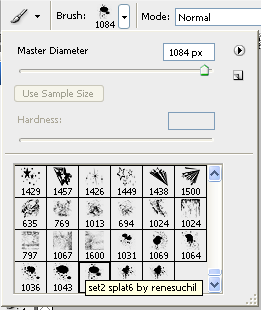
The first brush set we are going to use can be found on Brusheezy but to save you time finding it there is a link to it HERE, once you have downloaded the brushes load them into Photoshop and use the brush shown below:

With this brush selected create a New Layer (CTRL + Shift + N) and set black as your foreground colour and then press the ” [ ” key on your keyboard this will make the brush go smaller, I made mine go to 200px and the applied it to the top right hand corner of the rectangles we created earlier:

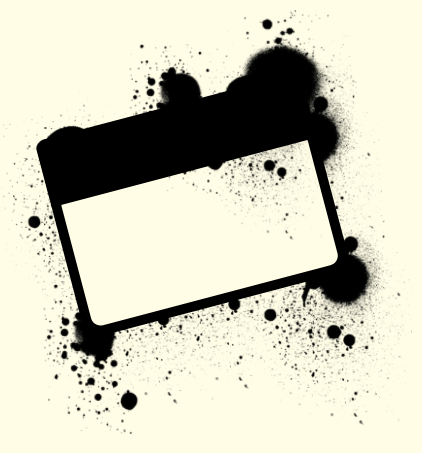
Now you have the basic principle you can play around with the different brushes in the pack and apply them all over the shape, but make sure to create a new layer for each separate brush as this allows you to change them later if needed, when I had finished playing around I had something like below:

Now if you wanted you could change the foreground colour of the brushes and apply some more around the rectangles to make it look more warn like below:

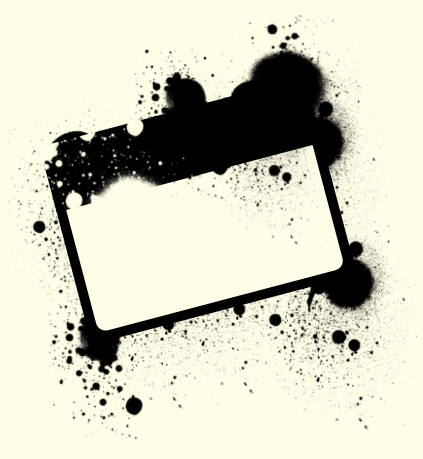
Next we need to add the second set of brushes which can be located and downloaded HERE and then we can start playing around with these brushes, there aren’t a lot in this set so just choose the brushes that you like the best and apply them on your banner, you can use the below image as reference (Note: Make sure the foreground colour is set to black #000000)

As you can see it is just a case of experimenting where you want the brushes to go and where looks good, when you have something you are happy with then we can move onto the final step.

Step 4 - Adding The Text

Now it is just a case of adding some text to the banner I simply added the name of my website like below (Note: I used the Font TW CEN MT Condensed Extra Bold) when the text has been been added simply rotate as before and place inside the of the banner:

Now to finish off you can some more of the splatter brushes over the top of the text which would help make the text look worn and grungy like the rest of the image and when this is done you have the finished product like below, this could be used for posters or websites the list is endless:

And as always if you have any problems with this tutorial then don’t hesitate to leave me a comment or email me at: stevie489@googlemail.com and I will help you as much as I can…

Creating A Vector Style MacBook From Scratch

by Steve Tolley

This tutorial is quite a long one, so I would go get a drink now if I were you, OK we are going to make a MacBook Pro in Photoshop using shapes and different blending options, combining these two simple things we get a realistic vector outcome which can be used in many different situations, so…let’s begin,

What We Are Going To Achieve

Below is the outcome of this tutorial, as you can see it looks fantastic and it’s not that hard to create…
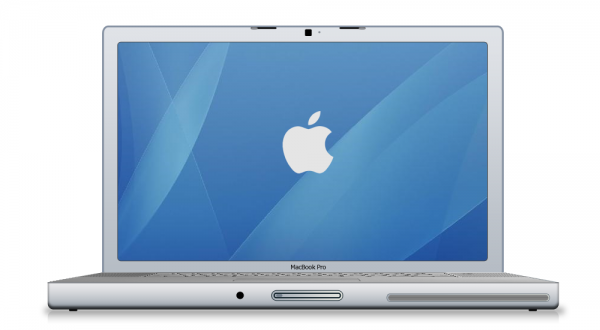
First of All

Don’f forget to create a new document as always this time I am using the sizes 1000 x 800 to make sure I can add alot of detail to the Mac

Part 1 - Basic Shapes

This section will cover creating the basic shapes for the Mac, so here it doesn’t matter about colours or gradients but make sure to use slightly different colours for each seperate section as not to get confused between them, this combined with giving each layer it’s own name will help to differentiate between them.

Step 1 - Creating The Front

The first step is to create the front of the Mac, to do this simply pick the Rounded Rectangle Tool (shown below) and draw a fairly long rectangle similar to the one below:

The shape is drawn near the bottom of the canvas in order to leave enough room for the rest of the Mac above:
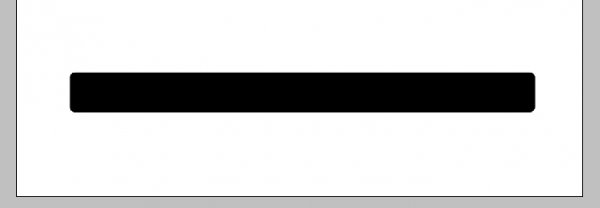
When the shape has been drawn right click the layer in the layers tab and choose rasterize layer this is so that we can erase some of the top, to do this choose the Rectangular Marquee Tool (shown below) and cut off the top of the rectangle with a selection similar to below, this is to get rid of the curved top and create a flat base:

Selection to be made:

Once the above selection has been made press delete on your keyboard to be left with a rounded rectangle with a flat top:

Step 2 - Creating The Keyboard Section

This step will show you how to create the keyboard section for the Mac, this will require us to create some perspective so it looks like it is 3D, First slightly change your foreground colour and then draw a rectangle like below using the normal Rectangle Tool:
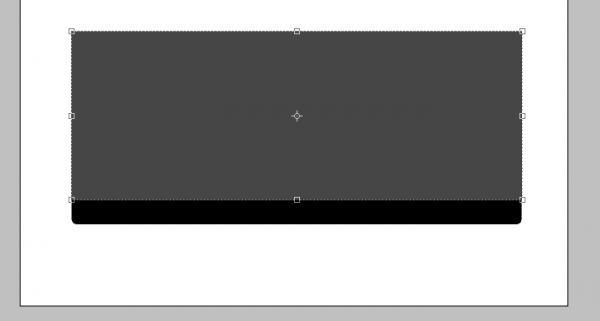
Now press CTRL + T to make it so that the shape can be transformed and on one of the anchor points right click to bring up the transformation menu, from this menu choose the Perspective option:
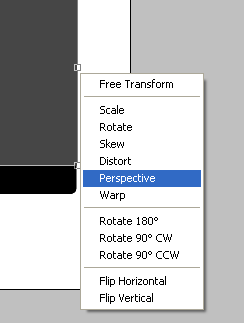
Now when you click and drag one of the anchor points it will make the shape seem to get smaller therefore creating perspective, with this option click the top right anchor point and drag to the left so that you have something similar to below:
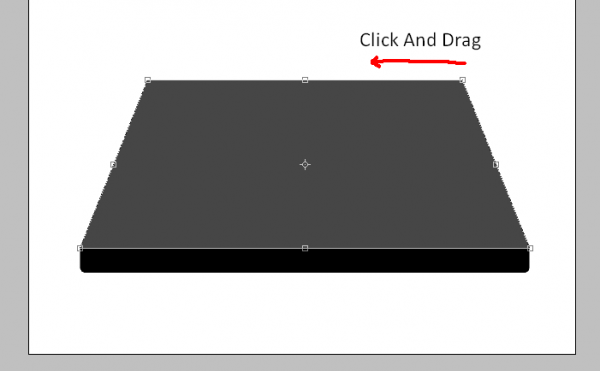
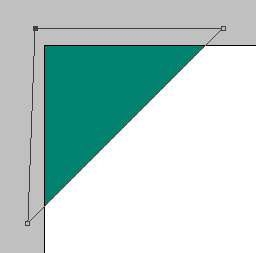
Now you have the above shape then you need to make it smaller, so make sure you are out of the transform option by pressing Enter or clicking the Tick Icon in the top toolbar, and simply drag the shape downwards so that it isn’t as tall and you should have something the same as below:

Step 3 - Creating The Screen/Monitor

To create the screen is simple as it is just one rectangle but making sure you get the size right is important as it won’t look realistic if the screen is to big/small so again slightly change the colour of the foreground colour and simply choose the Rounded Rectangle Tool and draw the shape below (Note: After the shape has been drawn simply go to the layers tab and drag it below the keyboard layer so that it doesn’t appear on top of it)

Position in Layers Tab:
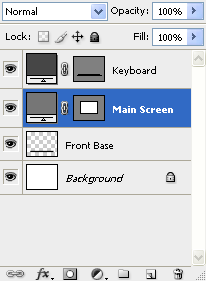
Main Screen Drawn:
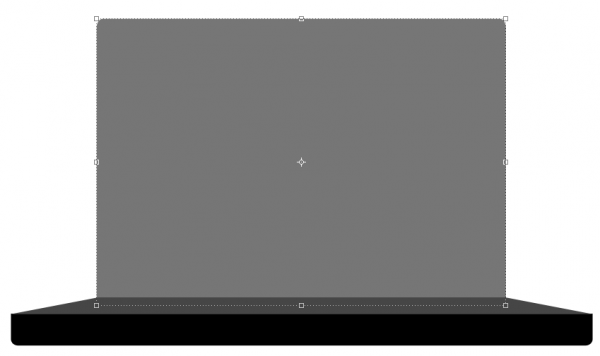
With this done we now need to create the final main shape which is the inner part of the screen

Step 4 - Creating The Inner Screen

The final main shape to be drawn is the inner part of the screen which again is just a simple rectangle but it’s size and position is important, so as before make sure your using the rounded rectangle tool and drawn the below shape with again a slightly different foreground colour:
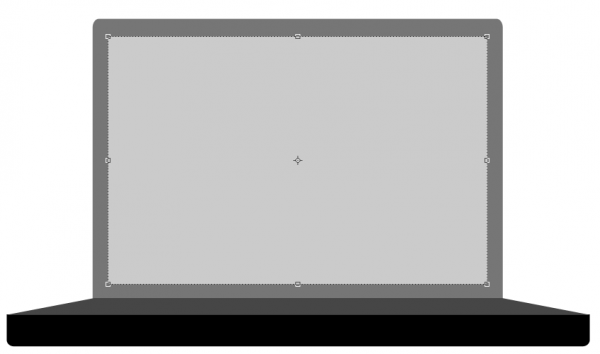
Part 2 - Adding The Blending Options

Now we have all of the main shapes we can start to add the blending options to each different shape to make them look more like a MacBook,

Step 1 - Blending Options For The Front

To get the blending options menu up simply double click the chosen layer in the layers tab which will bring up the blending options menu,

Most of the blending options for the layers are similar as to what options to use but the settings for each maybe different so I will just simply put up the screenshot of each setting followed by what it should look like,

Inner Shadow:
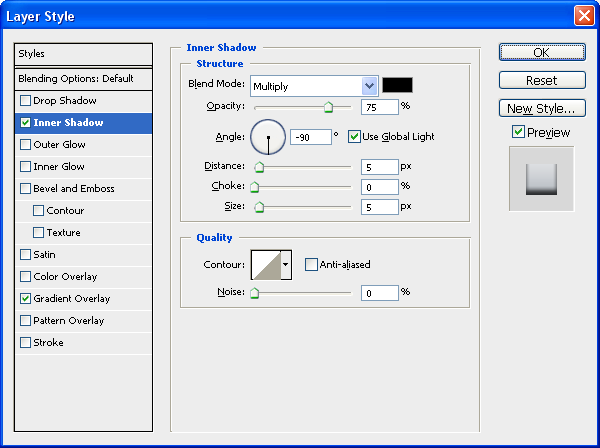
Gradient - Set To 90 Degrees:
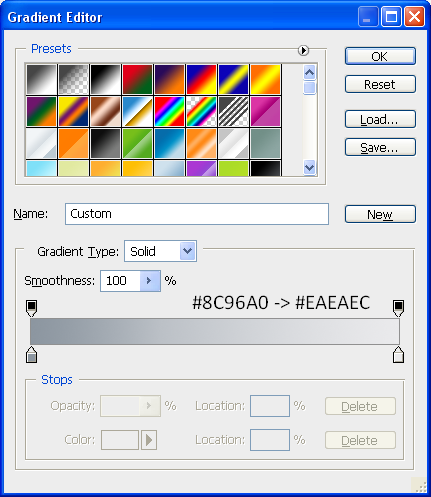
After applying these settings then your front should look like this:

Step 2 - Blending Options For The Keyboard Area

Inner Shadow:
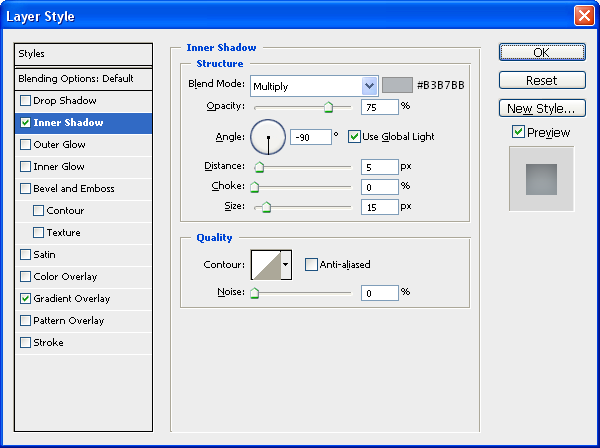
Gradient - Set To 90 Degrees:
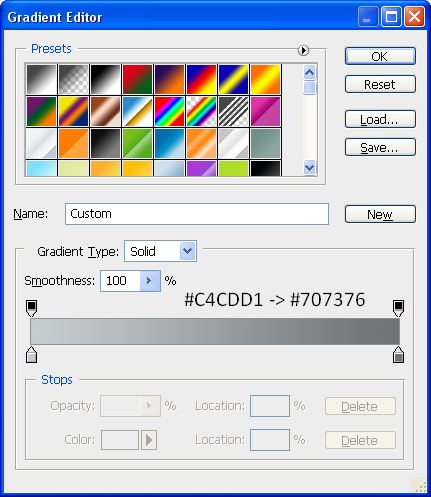
After applying these settings then your keyboard area should look like this:

Step 3 - Blending Options For The Outer Screen

Inner Shadow:
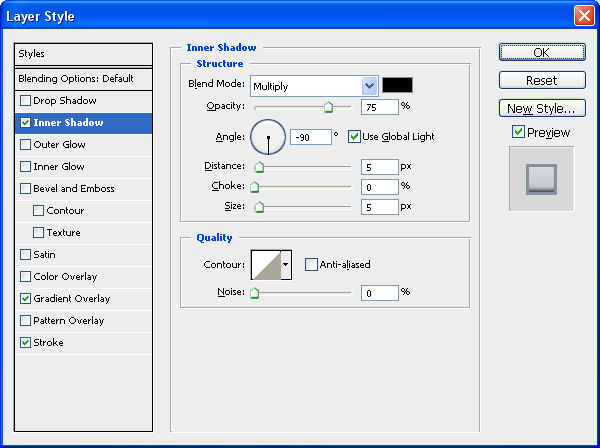
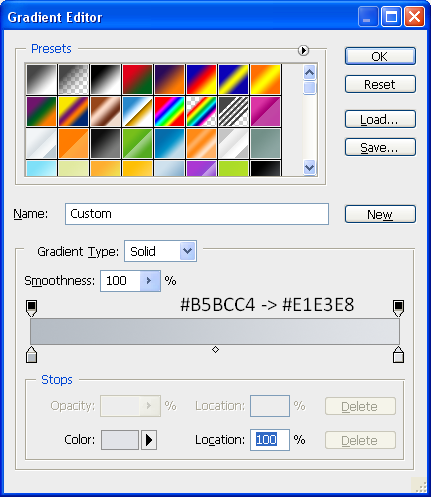
Gradient - Set To 90 Degrees:
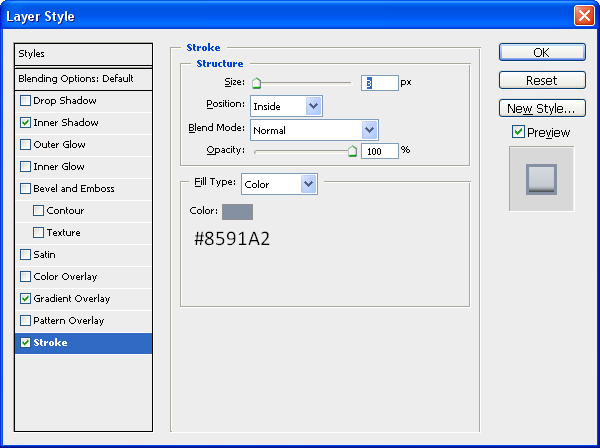
Stroke:
After applying these settings then your Outer Screen should look like this:
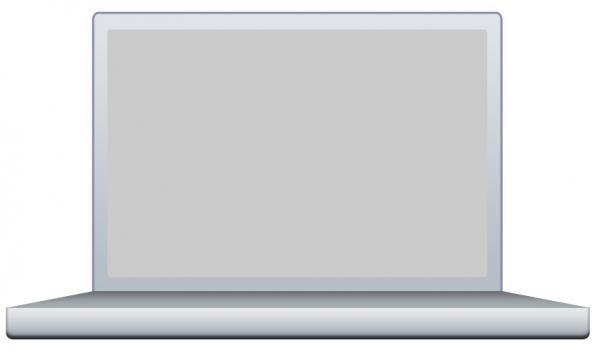
Step 4 - Blending Options For The Inner Screen

This being the most simple part all it has is a Stroke as an image will be placed over the top later to make it look more like a desktop screen:

Stroke:
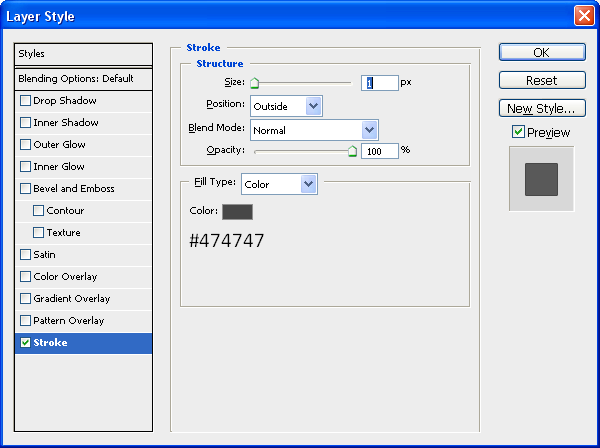
So after all these options have been applied you should have something that resembles a laptop sort of shape and more specifically a MacBook Pro shape and colour, the next section we will start to add some details onto the image.
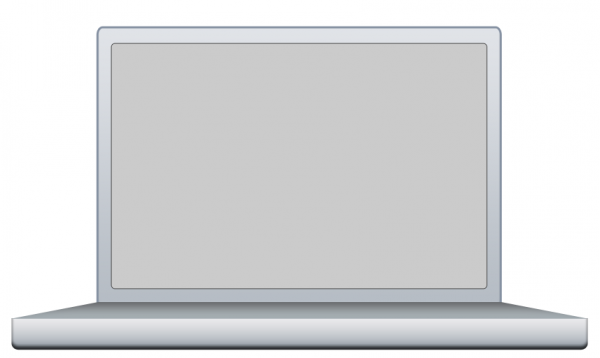
Part 3 - Adding The Details

Possibly the most time consuming part is adding the little details e.g. buttons, webcam etc…but all of it adds to the realism so lets start with adding a wallpaper to the background,

Step 1 - Adding An Image To The Inner Screen

First thing is first, we need an image to add to the inner screen, so I have just chosen a standard Mac wallpaper that you seem to see everywhere, but for the sake of this tutorial we shall use THIS image

To add it to the inner screen simply copy and paste it into your document and place it directly above the Inner Screen layer in the layers tab,
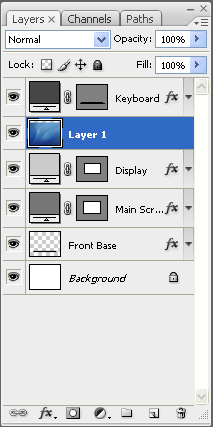
When it is in the right position simpy right click the wallpaper layer and choose “Create Clipping Mask” which should make it a clipping mask of the Inner Screen layer and just be displayed there as shown below:

Step 2 - Adding The Button on The Front

Now we need to add the button on the front of the Mac which is simply three rounded rectangles inside one another,

Outer Part:

Choose the Rounded Rectangle Tool and set the radius to 20px (Top Toolbar) and draw a rectangle in the middle of the front base the same as below:
Now add the following Blending Options:

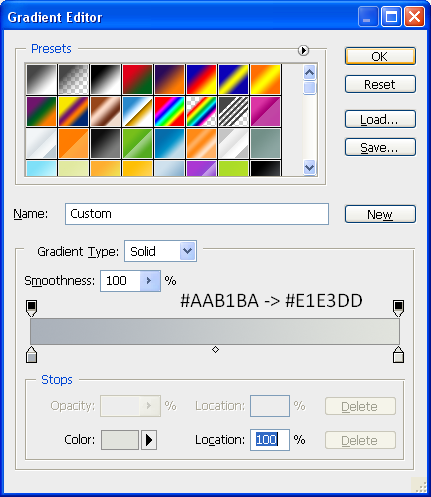
Gradient - Set At 0 Degrees:
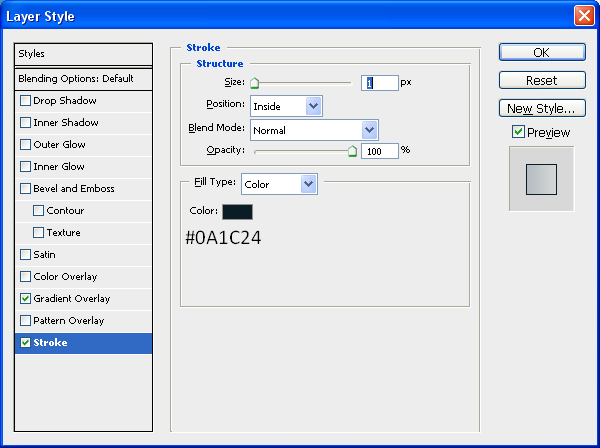
Stroke:
Now once this is done you should have something the same as below:

Inner Part:

The inner button is pretty much exactly the same as the outer button except it is smaller so it fits inside the outer button and also it has the same blending options except the Stroke is set to 2px instead of just one, use the below image for size referencing:

(Inner) Inner Part:

This is simply just a very small inner rectangle with the colour #717D8A and is placed within the inner part on the left hand side:

Step 3 - Adding The CD Slot

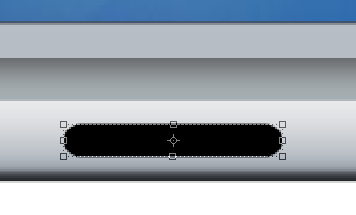
The next part is to add the CD slot onto the front of the Mac, to do this first draw another rounded rectangle with the radius set to 20px, this time draw it on the right hand side of the image and then go on Blending Options and use the same Blending Options as used on the Outer Part of the button, when done you will have something similar to below:

Now we need to add another inner part to the CD drive this is where the CD bit actually goes but there is no blending options needed for this so set the foreground colour to #808080 and draw another rounded rectangle just inside the outer part, use the image below for reference:

Finally for the CD drive we need to add a little slot in the middle so that it looks like a CD can be put inside for this use the Line Tool (Shown below) and set the foreground colour to #6E6E6E and draw a line from the left edge to the right edge so that you have something like below:

Now to finish off the front of the Mac we need to add a little hole, where the headphones plug in (I think I can’t afford a Mac atm so wouldn’t know) to do this simply choose the Elipse Tool and draw a small circle on the left hand side of the button and make sure the foreground colour is set to black (#000000) and there we have finished the front of the Mac as shown below:
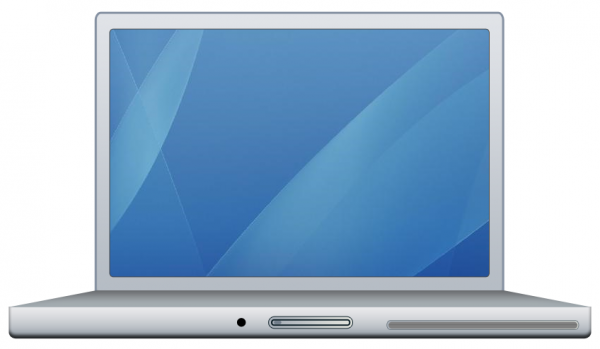
Step 4 - Adding The Clips At The Top

These clips are what keep the lid closed and are very simple to create as again it is just a case of using the Rounded Rectangle tool and creating two little rectangles,

1st Rectangle

The first rectangle is simply thin and long and just needs to be black (#000000) place it just to the left of centre at the very top of the screen as shown below (Note: Make sure the radius of the Rounded Rectangle Tool is set to 2px)

2nd Rectangle

This rectangle is the same thickness but also really short and needs to be placed on the very left of the first rectangle and on top, draw it with the foreground colour at #90939B and then go on blending options and set the stroke to the below settings,
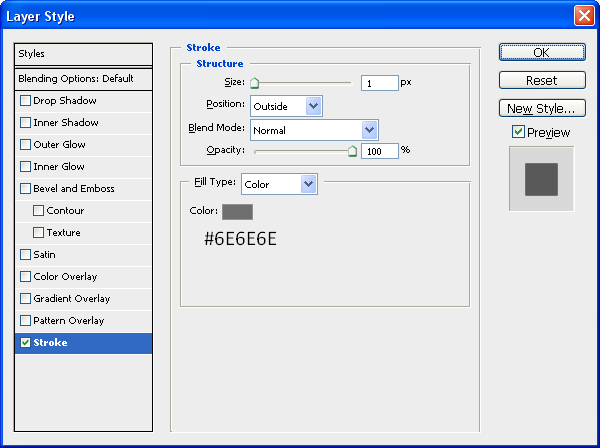
When this has been applied you will have something similar to below:

Now all we need to do is the same for just right of centre on the screen so that there is two clips, the best way to do this would be to in the layers tab go on the 1st rectangle and press CTRL + J (Duplicates Layer) and move it across to the other side and then do the same for the 2nd Rectangle, when this has been done you will have the same as below:

After this is done we are nearly there, just the webcam and feet to go,

Step 5 - Adding The Webcam

The simplest thing to add would probably be the Webcam as this is just a black rounded rectangle placed in between the two clips at the top and next to this a little dot which is found on Mac’s make sure the radius is set to 2px and simply add these two features using the below image as reference:

Step 6 - Adding The Feet

The penultimate step to creating the MacBook Pro is to add the feet simply again draw a rounded rectangle underneath the bottom of the Mac just in from the left hand side and make sure it is below your Front Base layer in the layers tab and when this is done simply press CTRL + J and transfer to the right hand side of the Mac and there you go you now have feet:

First Foot:

Second Foot and Progress upto Now:
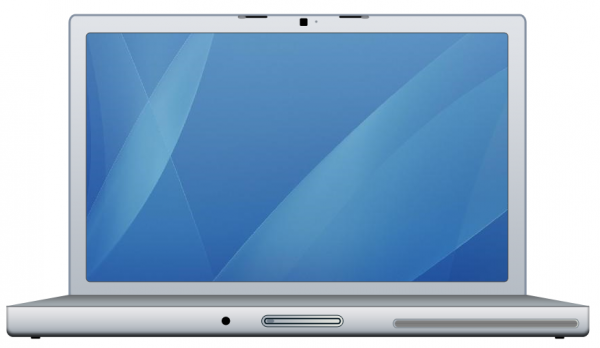
Step 7 - Writing MacBook Pro

The final main step is to simply write MacBook Pro in the centre of the screen just above the keyboard area I used font Verdana and font size 10, and then when this is done we have our finished MacBook Pro.

Alternatively you could keep going and add a shadow underneath and maybe a reflection, each of which I have written tutorials on:

Reflection

Shadow

And if you wanted to tell people Mac’s are made by Apple then you can add the Apple logo in the centre of the display, and below is the final image which you should have, click the image to see the full size version
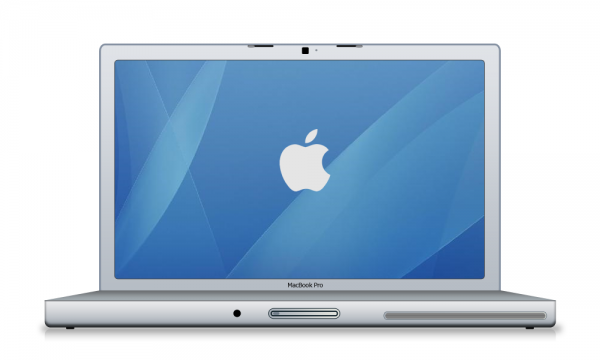
UPDATE: Thanks to an email from “Scot”, he sent me a picture of the Mac keyboard which can be implemented into the design first of all here is the picture:

Mac Keyboard

And to insert it onto the current keyboard simply open it up in Photoshop and drag it into your current document as shown below:
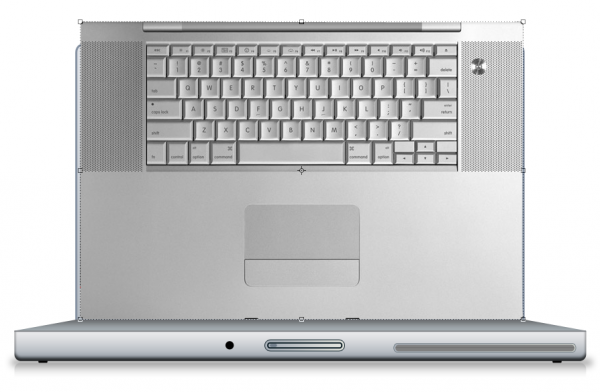
Now set the opacity to about 40% of the layer so that you can see through it and now press CTRL + T to go into transform mode, whilst in transform mode right click on one of the anchor points and choose Distort as shown below:
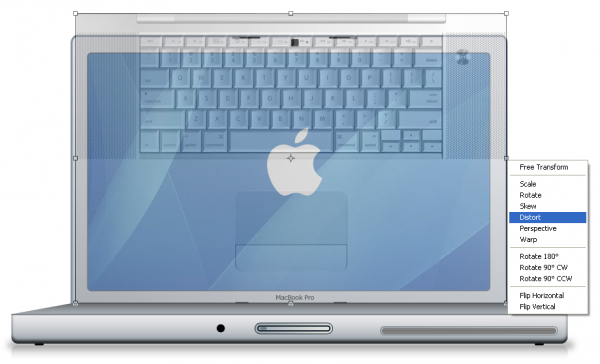
The distort menu allows you to drag the corners of the image in to any position, in this case we are going to drag them onto each corner of the keyboard layer like below:
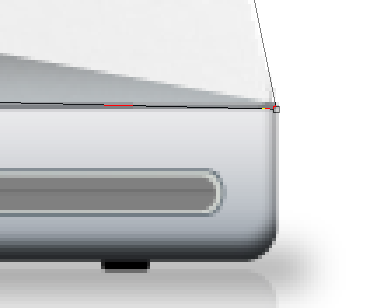
Using the above method do the same with the other 3 corners so that they each match up with the correct corners, when done press enter or the tick in the top toolbar to apply the transformation and set the opacity back to 100% then you will have something similar to below (Note: Zooming into the corner helps when tryin to be precise)
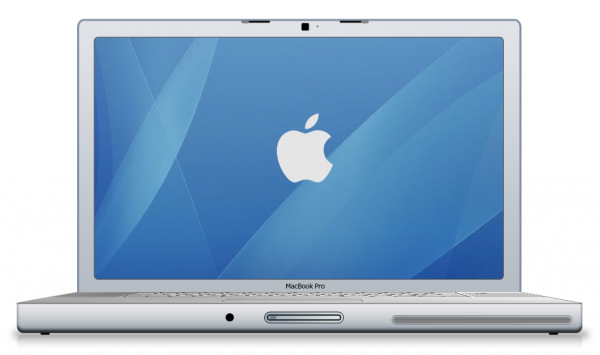
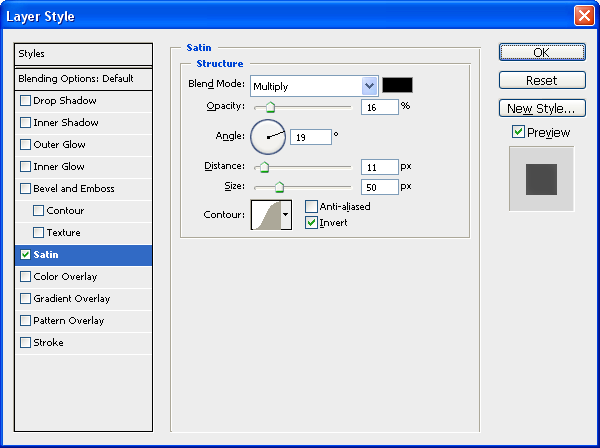
To finish double click the new keyboard layer to bring up the blending options and use the settings shown below:
When this has been applied then you are complete and we have the final MacBook Pro including the keyboard (Thanks to Scot) and we should have the final image like below:

And as always if you have any problems with this tutorial then don’t hesitate to leave me a comment or email me at: stevie489@googlemail.com and I will help you as much as I can…