17 of the Most Visually Beautiful HDR Images

by Steve Tolley

After a break for a little while, and concentrating on my University Assignments I am back with another collection of inspirational and stunning images, this time its a collection on beautiful HDR images,

What is HDR?

High Dynamic Range. An HDR image aims to store pixel values that span the whole tonal range of real-world scenes. In order to create such an image several low dynamic range (ie ordinary digital photos) taken at differing exposure values are combined.

This process then gives amazing images that have a full range of tones and colours, which look truly amazing as can be seen in the collection below, I hope you enjoy them:

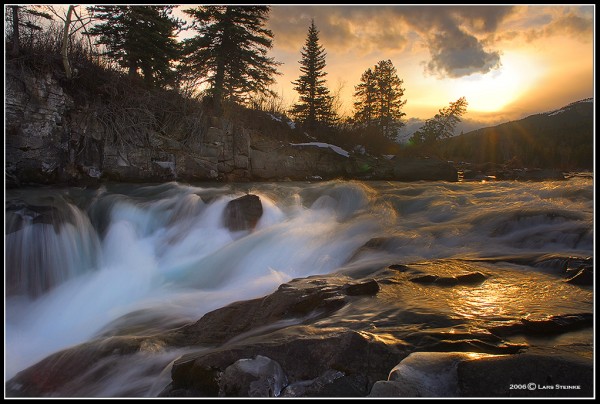
Waterfall

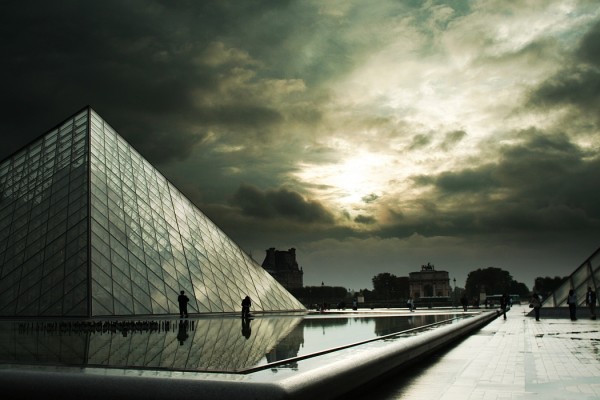
HDR at Le Louvre

Andalucia

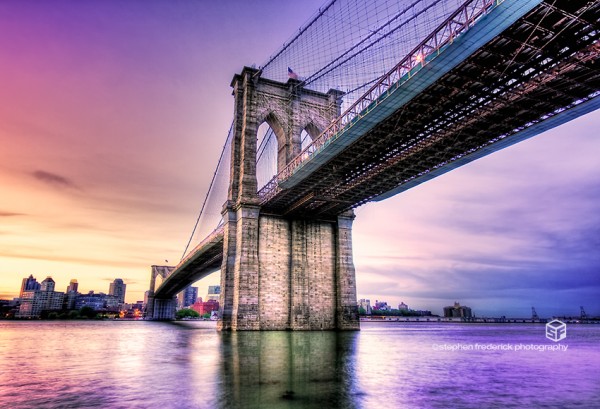
Brooklyn Bridge

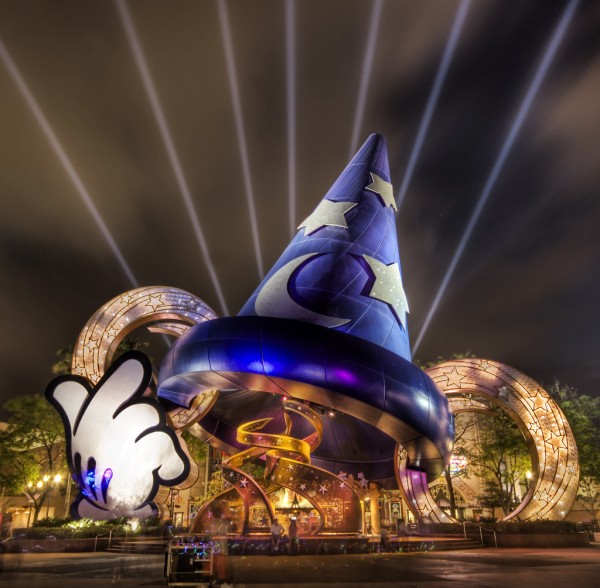
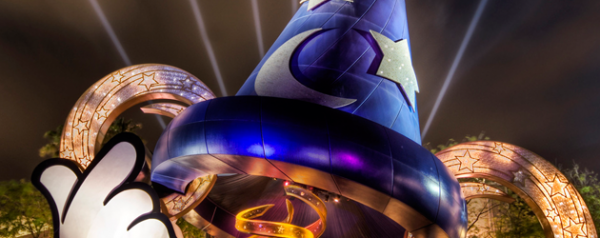
The Magic of Disney

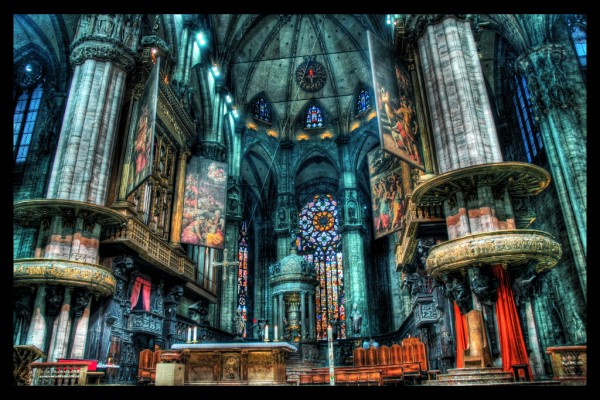
The Airy Doom of the Duomo

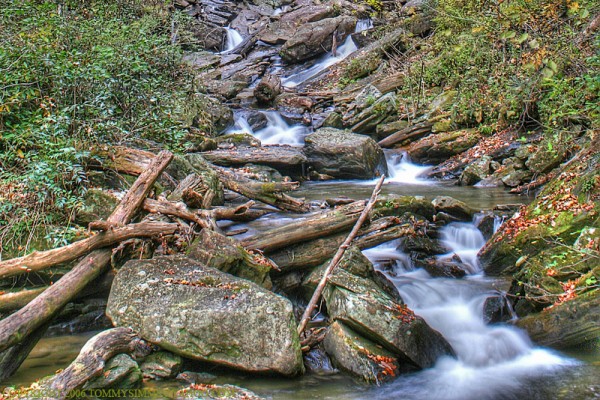
Autumn Stream

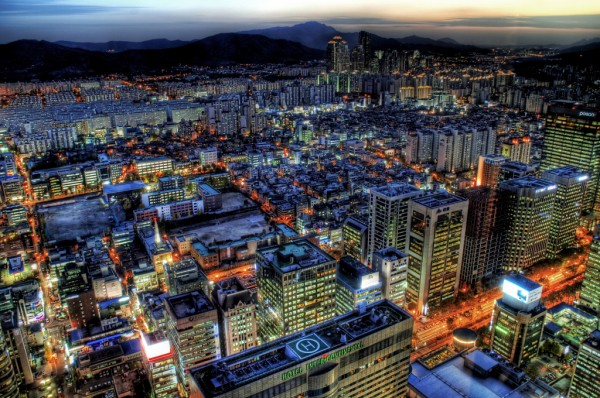
The Seoul of a Sunset

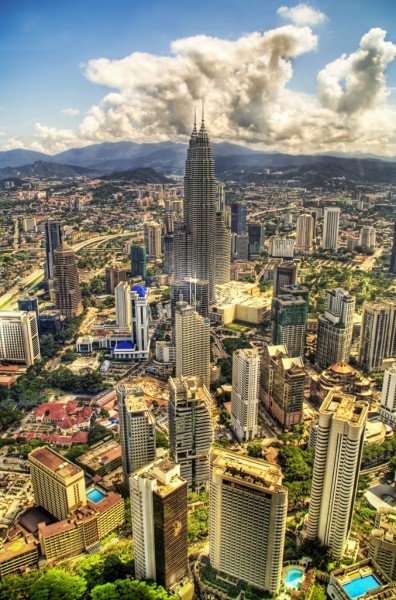
Farewell Kuala Lumpur

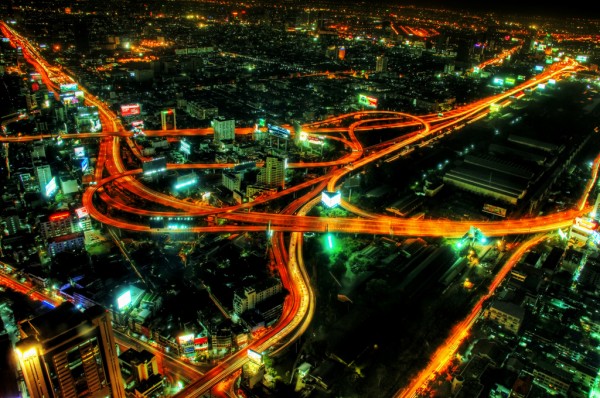
The Veins of Bangkok

Modern Day Loneliness

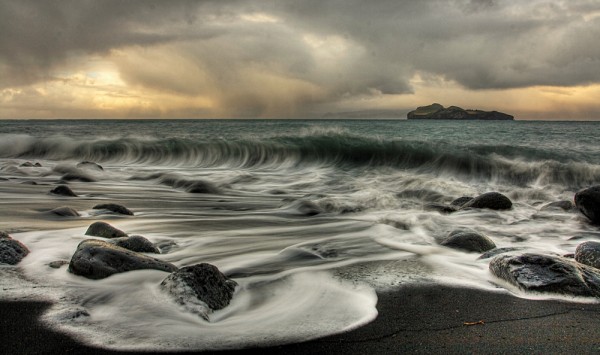
The Powerful Sea

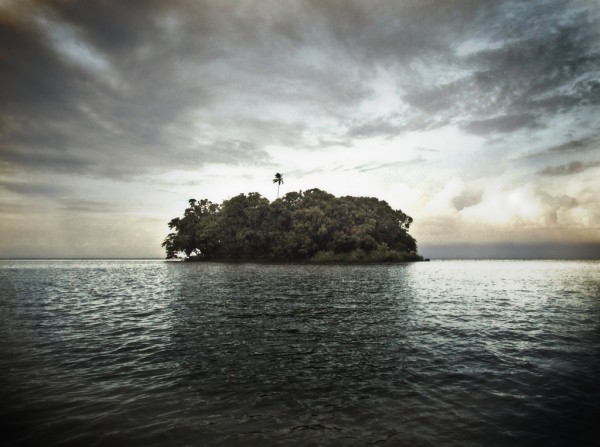
Treasure Island / The Island

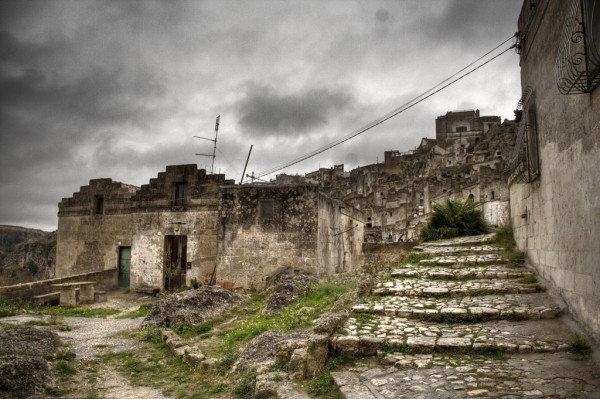
Abandoned Matera

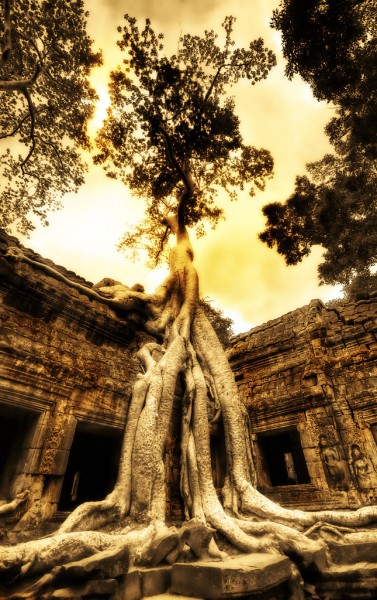
Swallowing The Ruins

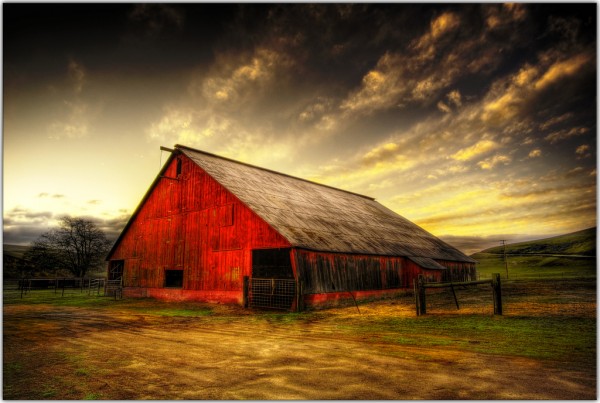
Barn

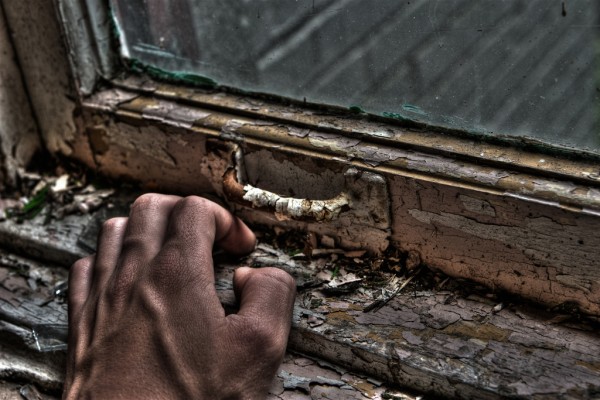
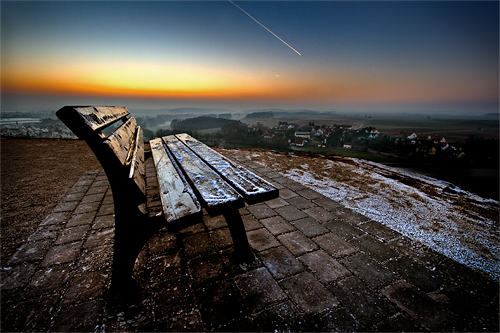
Bench Lighting

Other HDR Collections:

User Link Feed

by Steve Tolley

Hello! Welcome to the User Link Feed. Anyone can submit links with a short description which will then appear in the sidebar. Links must be approved before appearing and we filter out links that aren’t relevant to the audience. We generally want:

  • Links to Useful Resources and Downloads
  • Links to Tutorials
  • Links to Inspirational Work (*really good* work only please)
  • Links to Articles

You can submit your links below using the form. They are generally approved within 24 hours.

The ‘Colour’ Wallpaper Tutorial

by Steve Tolley

This tutorial is an addition to the previous wallpaper tutorial I did, as that got such a good response I thought I would make another wallpaper this time using different methods to achieve quite a unique look.

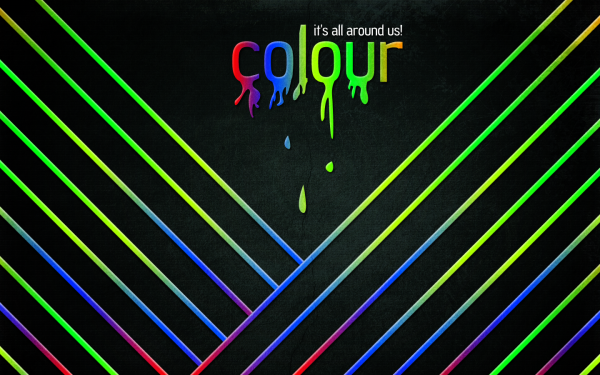
What We Are Going To Achieve
Step 1 - New Document

With this being a wallpaper tutorial you will need to make the canvas size the resolution of your screen, so therefore I am using the size 1440 x 900 but make sure you match it to your screen size and just go ahead and create a new document with these sizes.

Step 2 - Gradient Background

Now you need to fill in the background with a Radial Gradient, so pick the gradient tool off the sidebar and make sure that radial gradient is selected:

Now select the colours and set them to #243430 -> #000000 so that the greeney colour is on the left hand handle in the colour selection menu.

Step 3 - Texturing Background

Now that we have the colour set we are going to add a slight texture to the background to make it stand out some more, so double click the Background layer in the layers tab which will then make it an editable layer, when this is done again double click the now called ‘Layer 0′ in the layers tab to bring up the blending options and use the settings below:
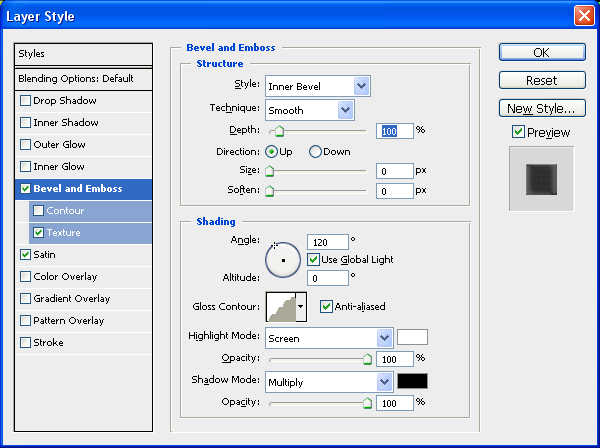
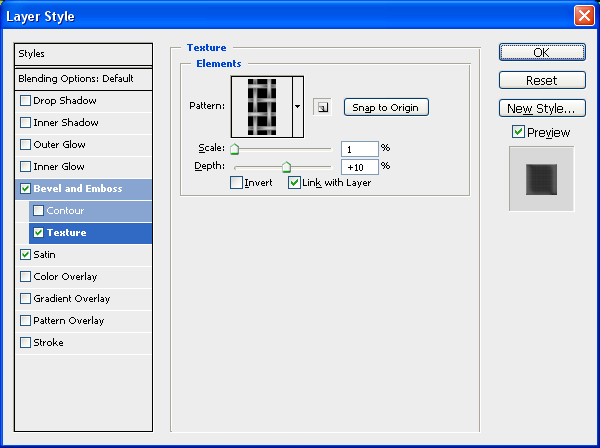
To get the below texture click the little arrow next to the preview and load the “Patterns” set of textures and choose the one shown below:
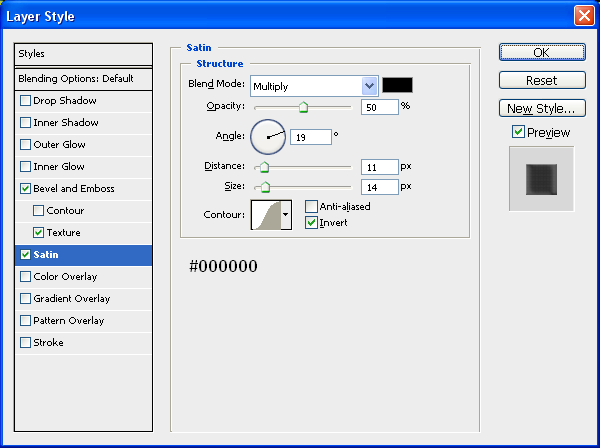
And finally add a satin effect to the background to darken it abit:
After applying all of these settings above you should now be left with something similar to below:

Click To Enlarge:
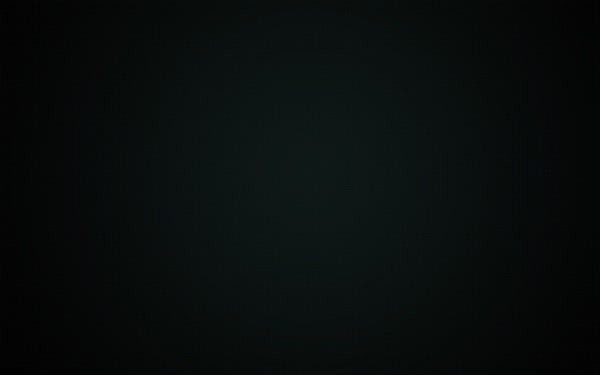
As you can see the texture really gives some depth and life to the image!

Step 4 - Adding The First Line

The main part of this image are the multiple lines that go diagonally across the image, this is simply one line with some blending options added which has then been repeated and manipulated to bring the sense of ‘colour’ to the image, to make this line we need to grab the rectangular marquee tool and draw a rectangle from one side of the image to the other:
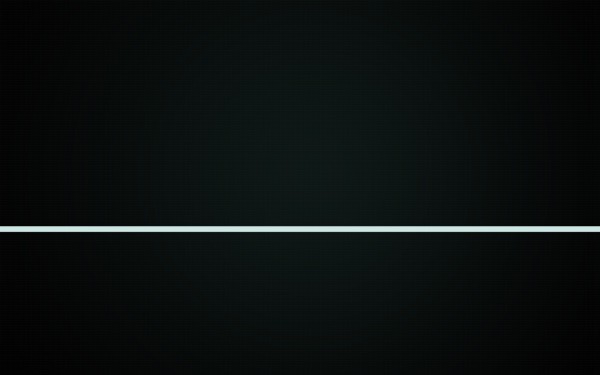
Now we need to style it by adding the blending options:

Gradient:

For the gradient try to match the colours as best you can, or you can use your own set of colours to match your style:
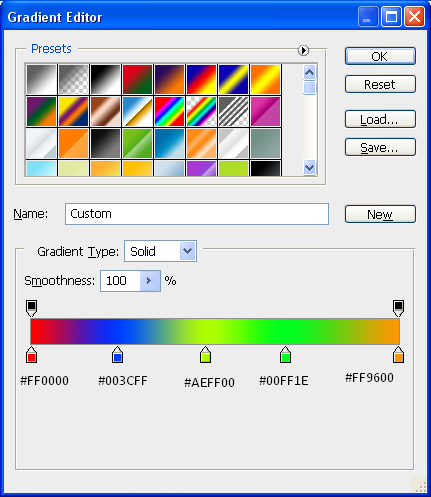
Bevel And Emboss:

And now a simple bevel and emboss, but we are going to remove the shadow from the option by taking the opacity down to 0% this is so that we get a nice highlight at the top:
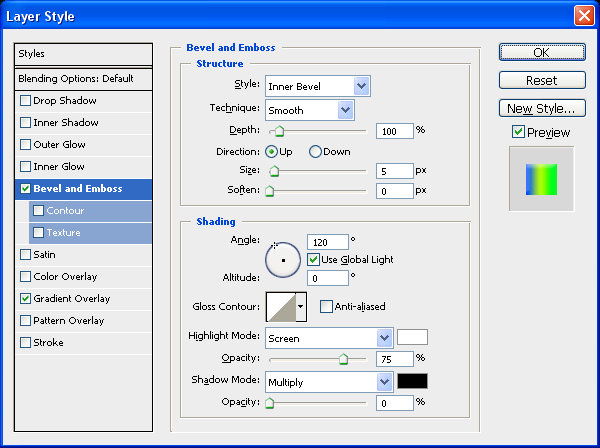
Also add a simple drop shadow with all of the default settings to give some depth to the line

With these three blending options applied you will have a line across your image that looks like this:
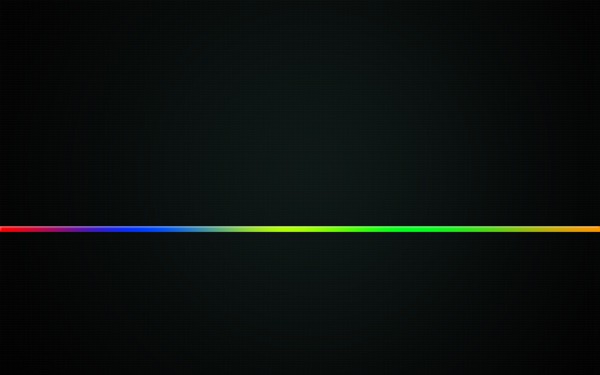
Step 5 - Multiplying The Line Across The Page

The best thing to do here would be to press CTRL + J to duplicate the layer and then hide the original one by pressing the eye in the layers tab next to the original line layer, this is so that you have one there you can come back to if you mess up further on.

With the duplicated line you need to rotate it to a 45 Degree angle, to do this press CTRL + T to enter Free Transform mode and hold down shift whilst rotating the layer until it is at a 45 Degree angle, with this done place in the bottom right hand corner as shown below:
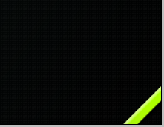
Now all there is to do, is duplicate the layer (CTRL + J) and reposition it above the one before it, and repeat this process until you have something similar to the image below:

TIP: Move the lines around a bit so that you get a different array of the colours rather than the same colour all the way through.
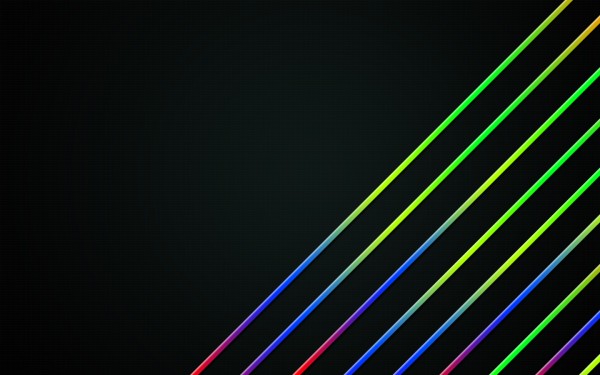
To create the lines on the other side of the image simply group together all of the previous lines layers and put them in a group:

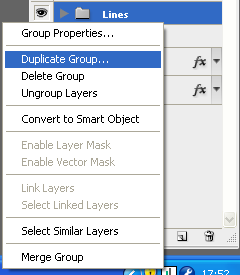
When the layers are in a group, the little folder icon appears with your group name, right click on this group and choose “Duplicate Group” which will make an exact copy of the group and call it something relevant e.g. “Lines Left”
Now with the duplicated group selected in the layers tab go Edit > Transform > Flip Horizontal which will flip all of the layers inside that group over, now choose the move tool and move to the left hand side of the screen and position in reference to below:
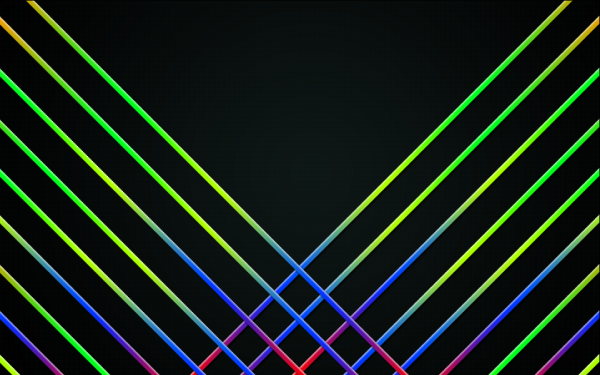
So they want to look like a mirror image of each other basically

Next we need to cut off the bottom of the lines, to do this we need to highlight the top line on the right set (shown below) when we have this layer selected in the layer tab CTRL + CLICK in the box next to the layer name to get the crawling ants around it:
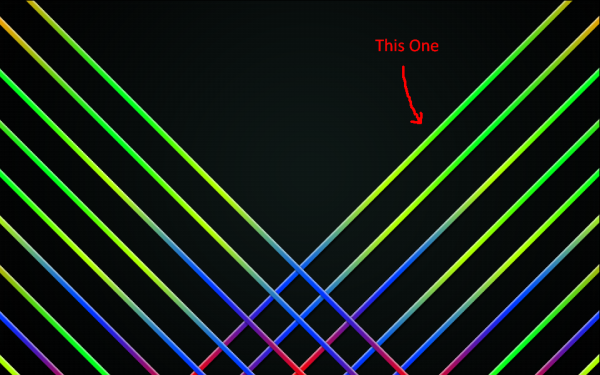
With the crawling ants around the line press CTRL + SHIFT + I to invert your selection, and the from the sidebar menu grab the magic want tool (making sure you still have the line selected in the layer tab) and then ALT + CLICK anywhere in the top left section of the image, this deselects this part and should leave the bottom right part of the image the only bits with crawling ants around.

With the bottom right selected select the group of the lines on the left and go through each of them pressing Delete to delete the part of the lines that are crossing over and you SHOULD be left with something similar to below:

(Note: The group of lines on the left need to be placed under the group of lines on the right in the layers tab so that they don’t appear on the top of the lines on the right)
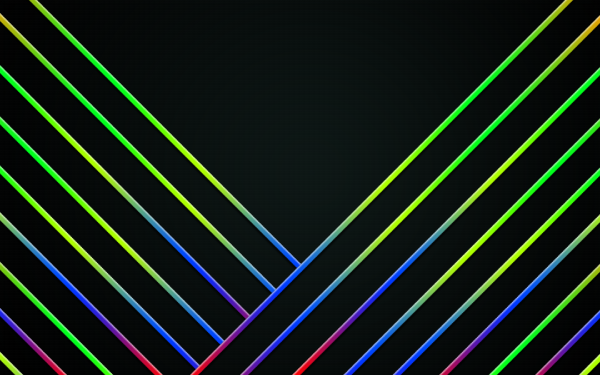
That is the lines finished with although you can mix and match the colours if you wanted to

Step 6 - The Text

This part involves writing out the text and adding the drips to it which is basically drawing drip like shapes below the text using the pen tool,

I chose the word “Colour” because I think it is what best describes this wallpaper so I proceeded to grab the text tool from the side toolbar and wrote the text in the middle at the top of the image, I used the font Jesaya for my text and then wrote the word colour, all in lowercase

(Note: As I am english I am spelling it the english way but you can spell it however you want to)

Now you should have something like below, note also that it doesn’t matter about the colour of the text at the minute as we will be adding a gradient to it later:
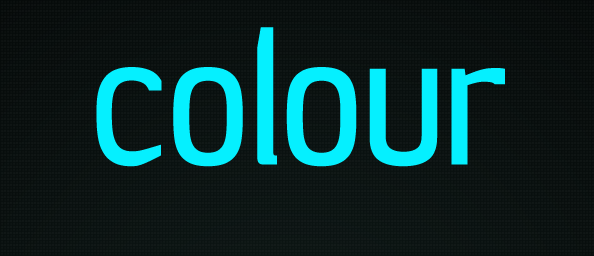
Now grab the pen tool and draw a drip like shape coming from the bottom of the letter “C”

(Note: Not all drips will be the same so play around and experiment with your own shapes and drips)

With this done I had something similar to below:
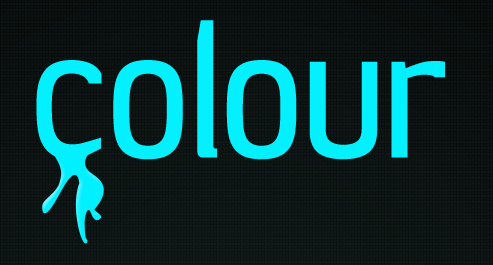
Now proceed to do the same with the other letters and remember to be creative with your drips and you can even miss letters out if you wanted it’s entirely up to you, when you are done playing you will have something similar to what is shown below:
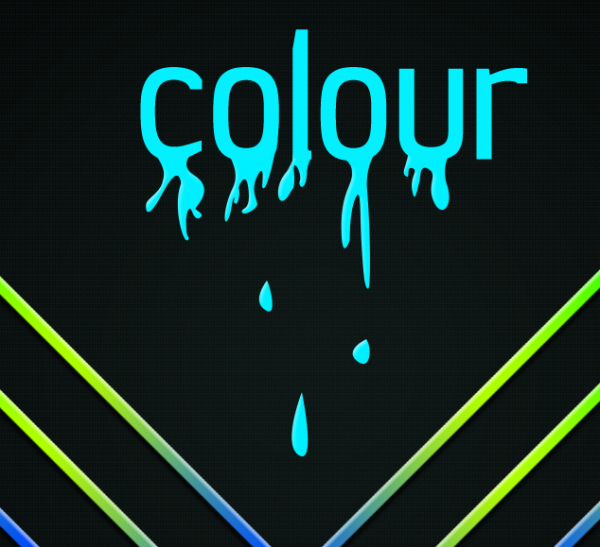
(Note: I also added some drips below the text to give the effect that it was falling off the text drips above)

Now select the text layer and all of the drip layers and right click and choose “Rasterize Layers” this will make them all into pixels (if they are not already) now right click again and choose “Merge Layers” this will make them all one layer.

To add the same effects to the text as you have on the lines then find the original line that you made in the layers tab and right click and choose “Copy Layer Style” and then go back to the now merged text layer and right click and choose “Paste Layer Style”

With this done you will have something similar to below:
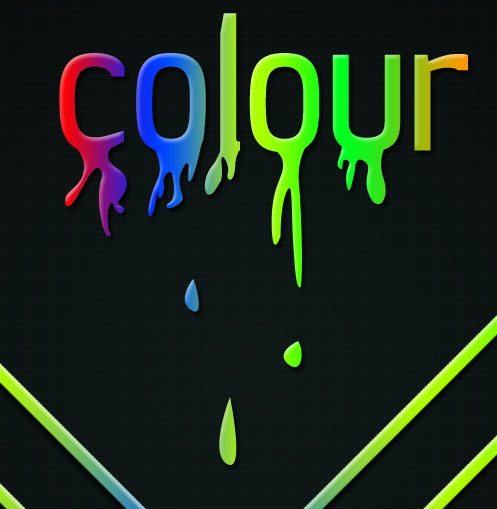
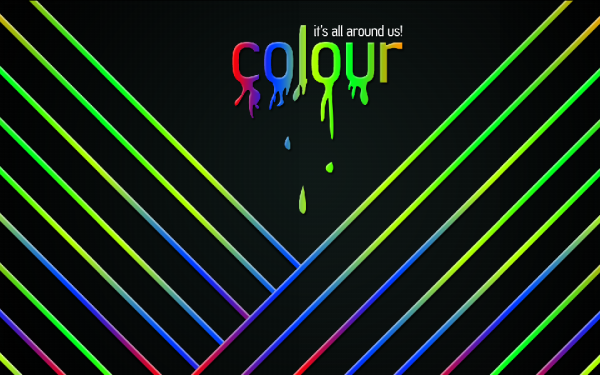
Now simply add a nice, relevant motto to the top right hand side of the text, I chose “It’s All Around Us” as the motto as I believe that it best describes colour at the minute as everywhere you look there is always some colour that stands out at you.

With all of the above steps completed you will have an image like the one shown below, and now only one more step to go and then we are done:
Step 7 - Adding An Overlaying Texture

To finish we are going to add a texture over the top of all of the layers so that it gives it some more depth and brings it more to life, the texture we are going to use is located HERE you may recognise this layer from a previous tutorial that I did on a retro grunge poster that has turned out to be very popular, with this in mind I thought I would use it in this tutorial, as also I think this particular texture definitely adds alot of depth to the image.

So once you have grabbed hold of the texture then open it up in Photoshop and drag and drop it into the wallpaper canvas, and resize and rotate if necessary so that you are happy with it and then with it selected change the layer style to “Soft Light”
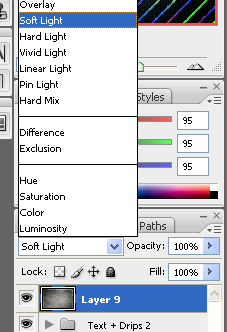
With this done you should be left with the finished wallpaper as shown below:

It would be cool to see what you come up with so feel free to upload them to the Photoshop Tutorials Flickr Group and leave me a comment to say when you have uploaded one so people can comment on them,

And as always if you have any problems with this tutorial then don’t hesitate to leave me a comment or email me at: stevie489@googlemail.com and I will help you as much as I can…
Making a Compact Disc Icon

by Steve Tolley

This tutorial will show you the steps and techniques used when creating a CD icon which can be used on websites etc… Very useful as the same techniques can be applied when making other icons/images

What We Are Going To Achieve

As you can see it looks realistic and it is also vector style so can be scaled easily

Step 1 - Create A New Document

The best thing to do when making an icon is to make a large canvas when designing it as this helps add detail and allows for the image to be scaled later without the worry of pixelating it, bearing this in mind I started out with a canvas of 500×500 so therefore I can scale it down later.

Step 2 - Creating The Basic Shapes

The first thing you need to do is create the basic shapes for the CD and then we will add the stylings later

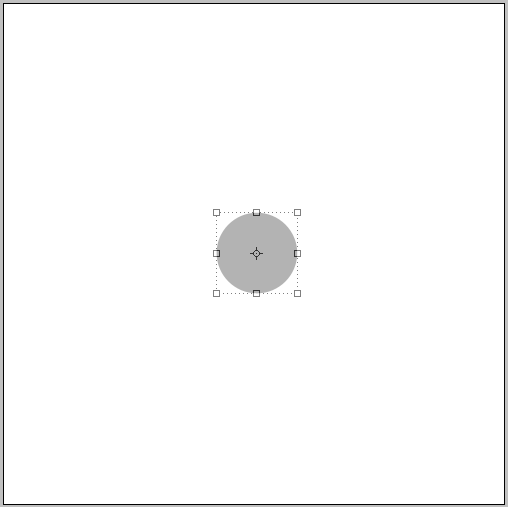
The first shape is a simple circle in the middle of the Canvas, to start with give it a neutral colour and then we can also change this later use the image below as reference:

First Shape:

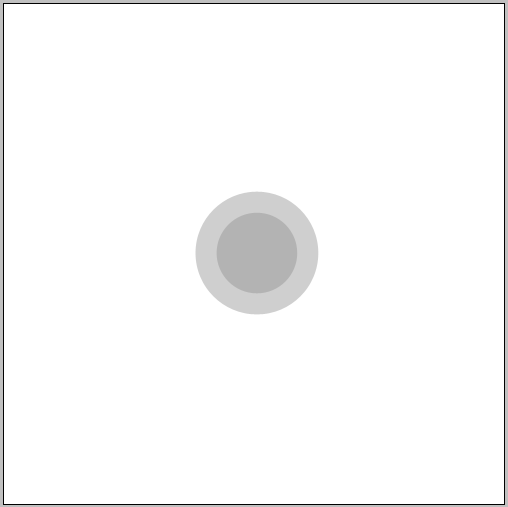
The next shapes are also simple circles so just use the images below as reference on where to put them and what sizes they all need to be:

Second Shape:

Third Shape:

Fourth Shape:

The next few shapes are different to make as they involve using the perspective tool and rectangles:

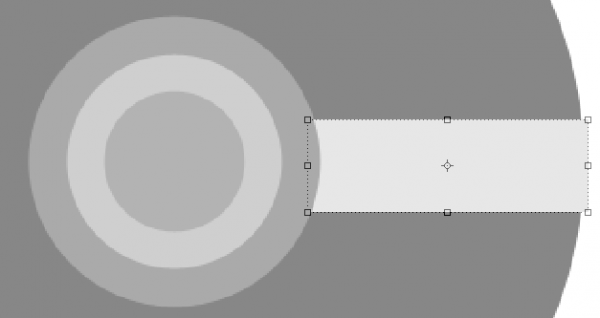
First of all grab the rectangle tool and draw a rectangle like below:

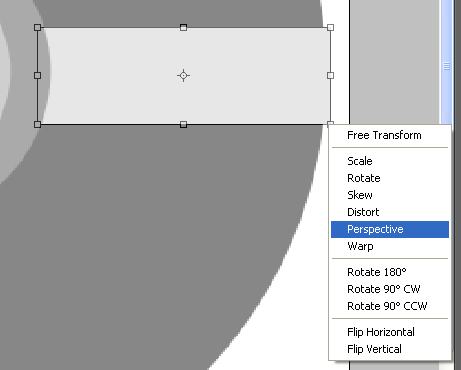
Next press CTRL + T on your keyboard to enter transformation mode, this then allows you to play around with the shape, simply right click on one of the anchors and choose “Perspective”

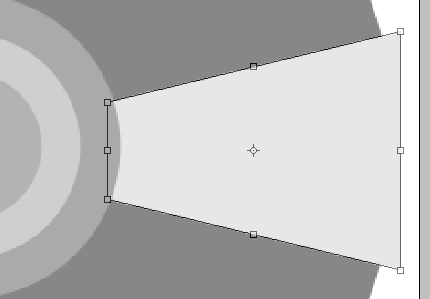
When you are in perspective mode then click on one of the right hand side anchor points and drag either up or down (depending on which anchor point you chose) the idea is to make one side larger than the other:

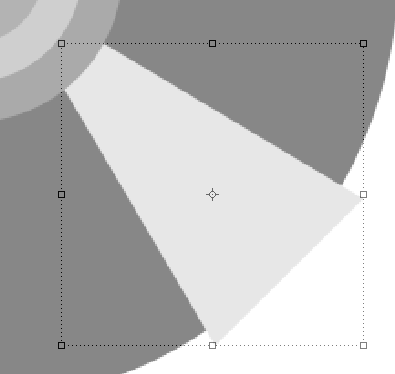
Now you need to move this rectangle to the desired position, to do this simply rotate the rectangle and place in the position you want, also if needed resize and change perspective:

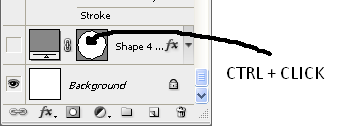
Now we need to make it fit to the outer shape to do this right click the rectangle layer in the layers tab and choose rasterize layer which allows the shape to be edited further, with this done CTRL and CLICK on the preview image of the Fourth Shape in the layers tab, like below:

This will give you the crawling ants around the biggest circle which indicated that it is selected, now press CTRL + SHIFT + I to invert the selection and make sure that the rectangle layer is selected in the layers panel and then press delete to get rid of the excess part of the rectangle to leave you with something like below:

Now press CTRL + J to duplicate it then simply rotate it and place it on the other side of the circle so that you have something like below:

Using the same principles as the above 2 rectangles we need to make 4 more, but they dont need to have the perspective added to them, so repeat the last few steps without the perspective steps so that you have something like this:

Step 3 - Adding The Blending Options

Now that we have the basic shapes in place we can start to add the blending options and effects which will then start to give this CD some life,

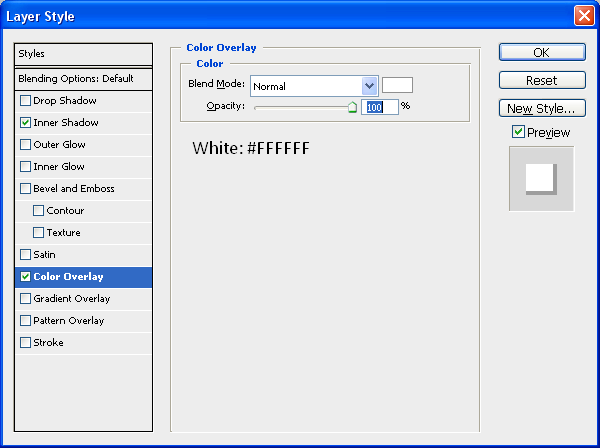
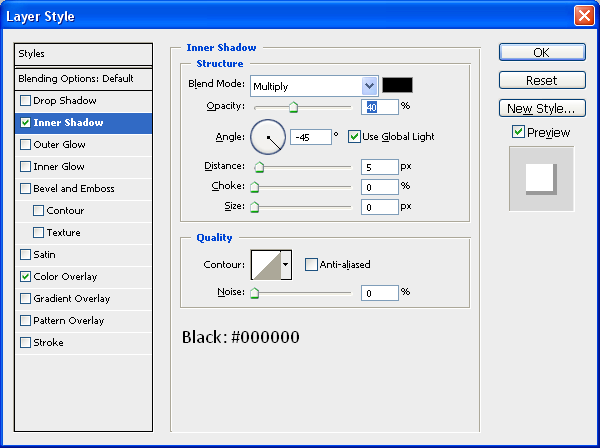
We will start with the first circle shape and work up from there, on this we need to set the colour to white and add a drop inner shadow using the settings below (to access the blending options menu simply double click the desired layer in the layers tab) :

Color Overlay:

Inner Shadow:

When these blending options have been applied your first shape will look something like this:

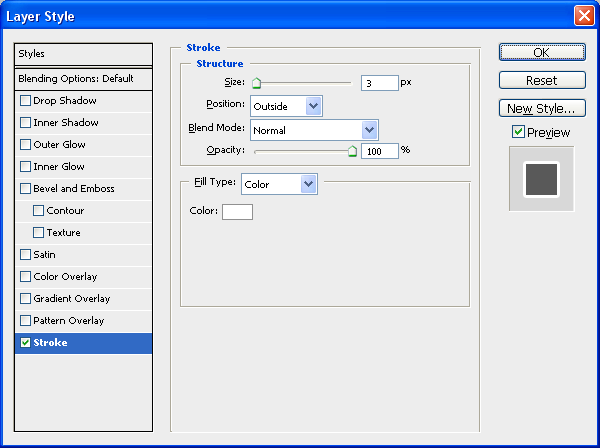
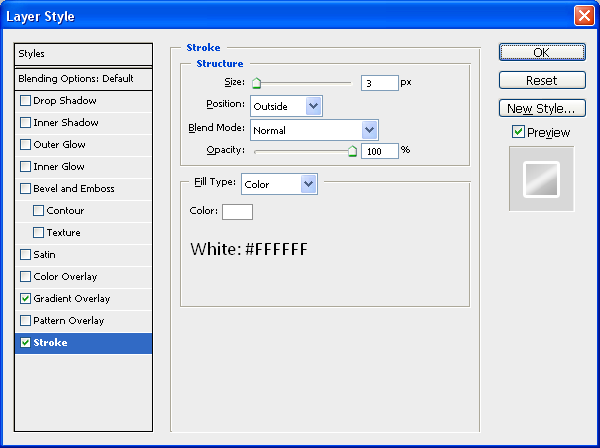
Now to move onto the second shape, on this shape we need to add a colour overlay again using the colour #CFCFCF and the add a stroke which is just plain white (#FFFFFF) and has a size of 3px:

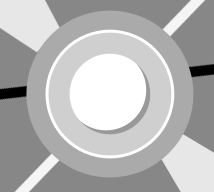
When the color and stroke have been applied you will have something like below:

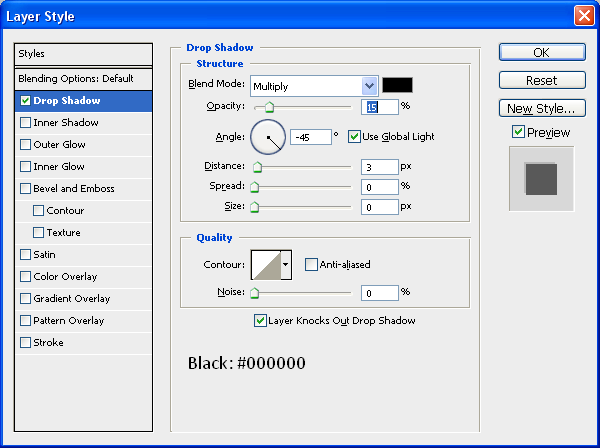
Now for the third shape we need to add a simple drop shadow, this effect is faint but will add to the final effect:

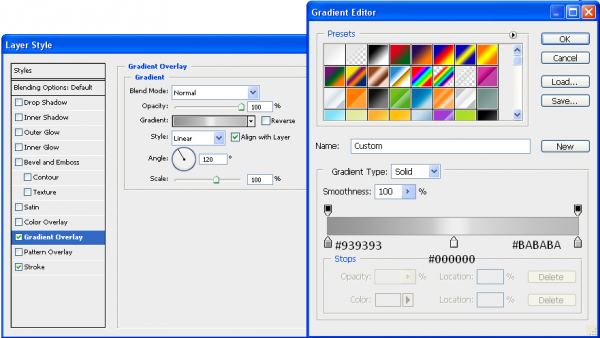
For the biggest circle we need to add the main gradient and a white stroke, for the gradient use the settings below:

And for the stroke you need the settings below:

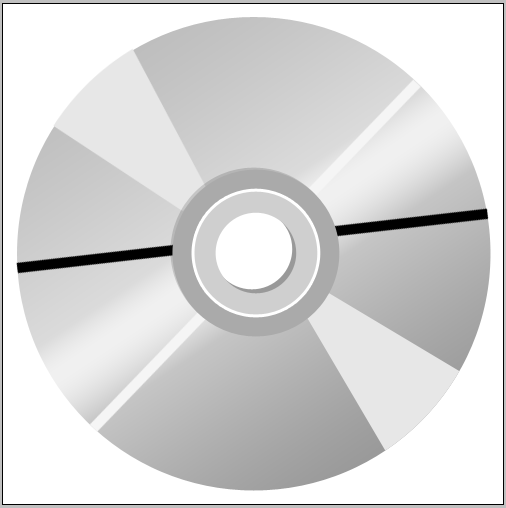
When these settings have been applied then all of the main basic shapes are done, and you will have something like the image shown below:

Step 4 - Adding Details

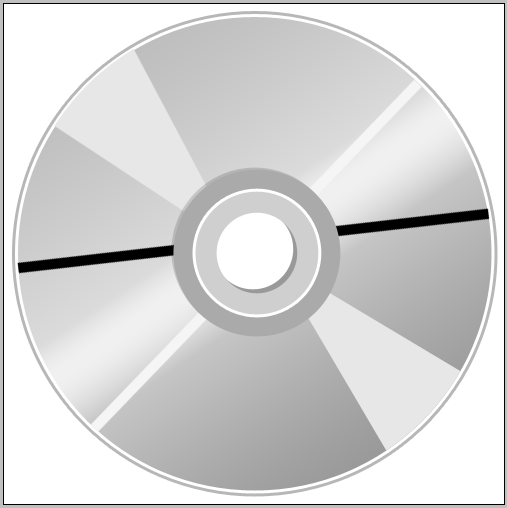
To give the overall CD shape a border the best thing to do is to duplicate the biggest circle shape and add a larger stroke to it, this will show the CD to have a grey coloured border, to duplicate just press CTRL + J when the fourth shape (biggest circle) is selected in the layers tab and it will create another exactly the same, then go into the blending options and add a stroke with a size of 6px and colour #B7B7B7, this will give you the image below:

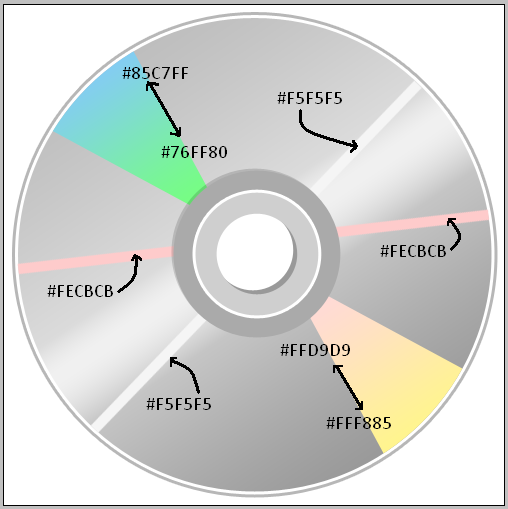
To finish off this CD we need to add some colour to the extra rectangles that we have created, using the image below as a colour reference simply add a colour overlay to each of them with the colours specified, or a gradient overlay if there are 2 colours shown:

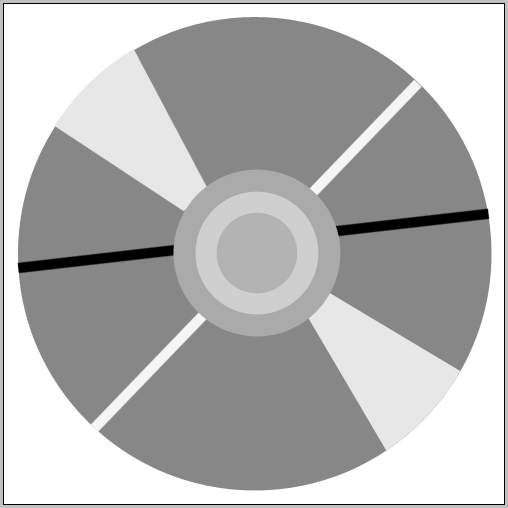
And there you go we are finished! once you have all of the colours and gradients added then you will have a finished CD icon which can be used for many different things, below is the fullsize finished image.

It would be cool to see what you come up with so feel free to upload them to the Photoshop Tutorials Flickr Group and leave me a comment to say when you have uploaded one so people can comment on them,

And as always if you have any problems with this tutorial then don’t hesitate to leave me a comment or email me at: stevie489@googlemail.com and I will help you as much as I can…
Also if you want, this CD will be in an icon pack that I will be releasing soon just leave me a comment and if I get enough people wanting the pack then I will release it when it is completed and I once I have done some more icons.

Monthly Roundup - September 08

by Steve Tolley

September has been a crazy month for me, getting prepared for university, trying to maintain this website, starting university and getting stuck in as well as releasing a second website it has all really kept me on my toes, hence the reason for the lack of posts/tutorials over the past week or two, hopefully things are settling down now and I can resume normal posting, roll on october…

But for now this is a round up of the best of the month just gone:

Tutorials

Lets start off with some of the best tutorials from this month, in no particular order:

Screen Shot Magic - MagnusFX

A great tutorial explaining how to spruce up dull screenshots by introducing some Photoshop magic

The RoboHorse - Tutzor

A very unique tutorial explaining how to turn a normal picture of a horse into a cool looking RoboHorse

Create a Shiny 3D Box - PSVibes

A very cool tutorial on how to make a 3D box icon that can be applied to many different designs/websites

Business Card on a Wooden Texture Table - NaldzGraphics

A nice tutorial showing how to realistically present your business card designs

Vibrant Photo Manipulation - PSDLearning

A fantastic tutorial explaining how to manipulate a photo to give a great colouful end result

Create An Amazing Ad In Photoshop - Abduzeedo

Possibly my favourite tutorial this month not just because of the amazing end result but the simplicity of the techniques used to get such a great effect

Articles

Now for some of the best design based articles, this was tough as there was so many to choose from but I just picked a few:

What Not To Do When Designing A Logo - Brian Yerkes

A great article explaining what not to do when designing a logo, informative and interesting, well worth a read

Web Design Inspiration: Brown - Design Shard

A nice inspirational article for web designers looking at brown coloured sites for inspiration, also Design Shard has just undergone a facelift and looks great check it out…

Talking Typography Part 1 - Arbent

A cool article looking at what different types of typography are used and how they are implemented

Resources

And finally some resources for you all to look at and use,

Out of Focus: 30 Free Bokeh Textures - Lost And Taken

A collection of great textures in the Bokeh style really useful and very nice

20 Free Handwritten Fonts - Fuel Your Creativity

A great collection of handwritten fonts useful for the more personal, scrapbook style look to a design

New Design Websites:

Just a quick shout out about a couple of new design related websites that have popped up this month:

The Creativity Wall

My latest website, that I officially released this month, a showcase for design related articles that will double up as a design database if you are ever looking for a design article or for a particular tutorial then this is the place to go, alternatively if you want to showcase your work here then simply submit it to me and I will upload it as soon as I can, gradually getting more subscribers and visitors per day, so get submitting to increase the amount of articles available…

Vot.eti.me

A great new website from Roger who also owns Styl.eti.me this website however is like a digg style site for designers and creatives, new links everyday and ever growing, well worth submitting your links to to attract fellow designers.

Thats it for September I hope you enjoyed this roundup and lets hope October is as good for the design community and keep the great articles and tutorials coming, I will surely try my best to create some good tutorials in the following month.